A scheduled message sends an approved template at a time you choose: once, or again and again on the days you pick. This guide shows your scheduled messages and walks through scheduling a new one.
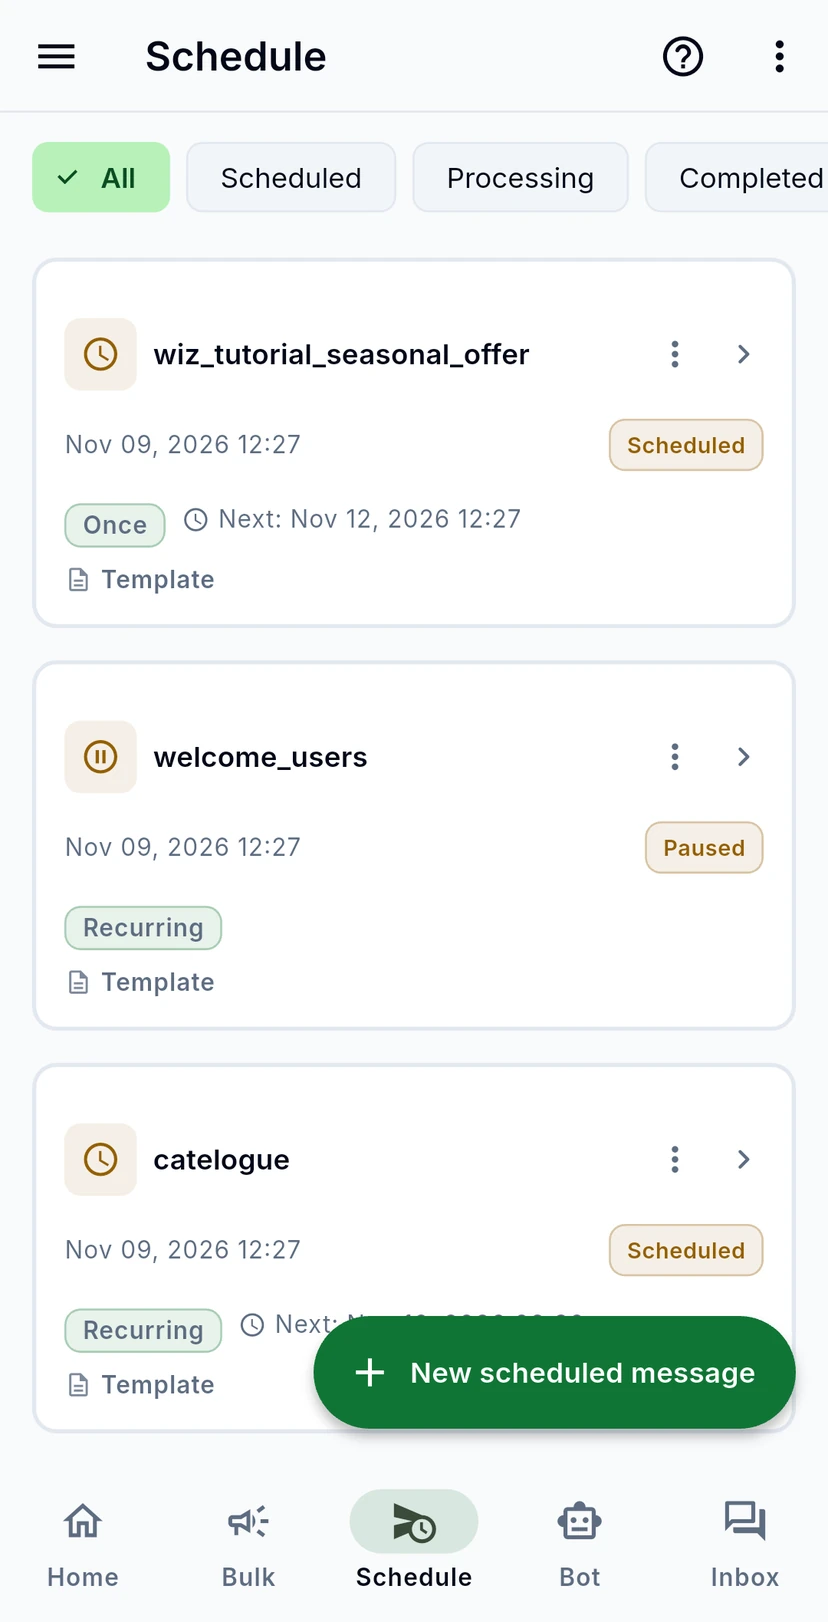
Tap Schedule at the bottom of the app. Every message you scheduled is here, one-time or recurring, with its status and its next run. Use the chips to show only one status, such as Scheduled or Completed.
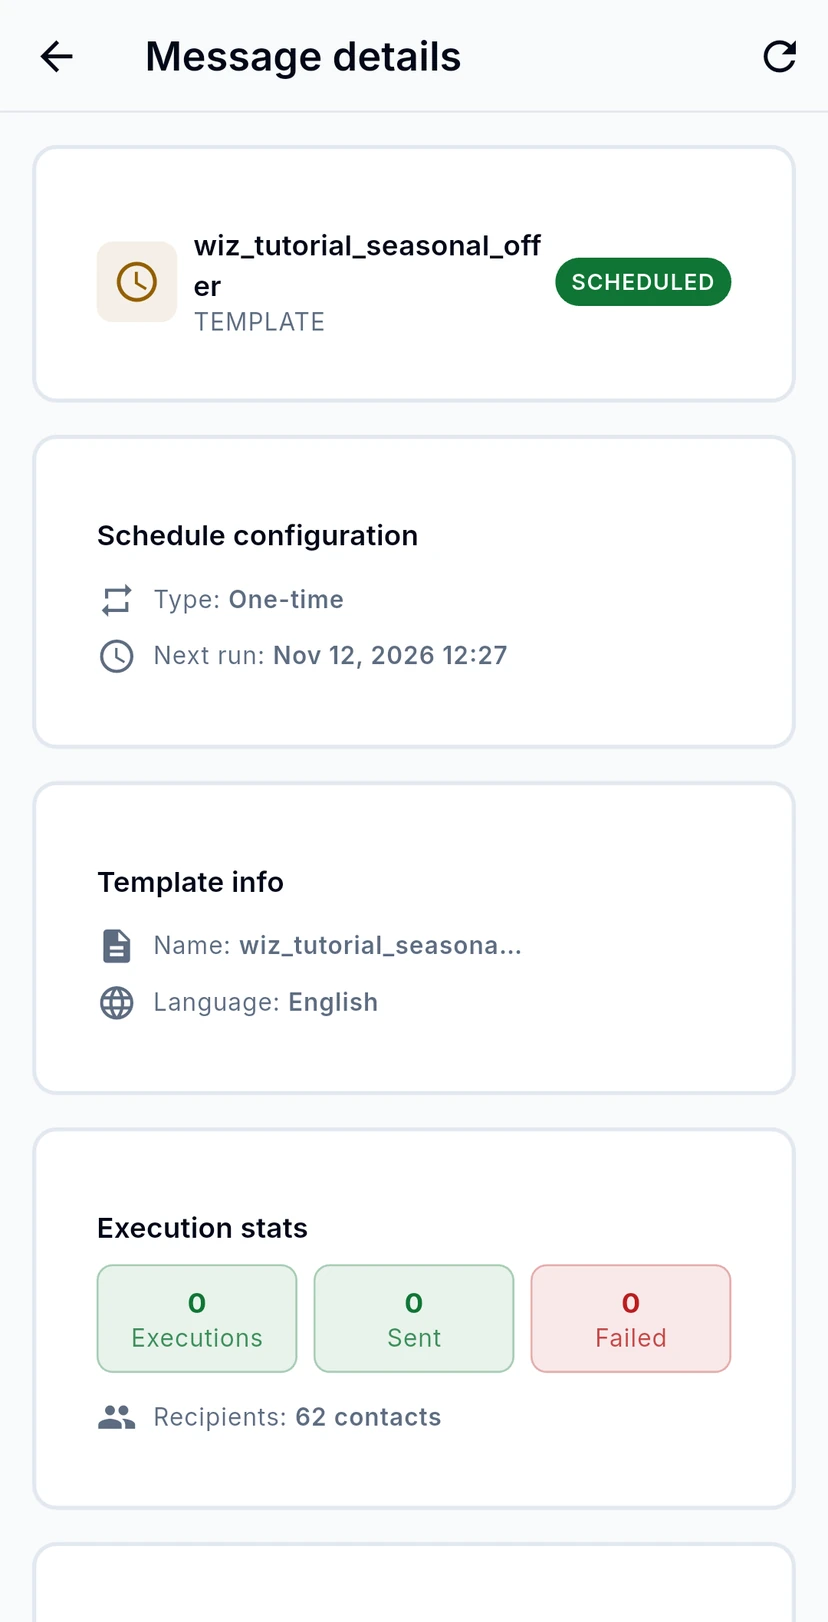
Tap a scheduled message to see its Schedule configuration (one-time or recurring, and the next run), the template it sends, and its Execution stats: how many times it has run, how many messages were sent and how many failed, and how many contacts it goes to.
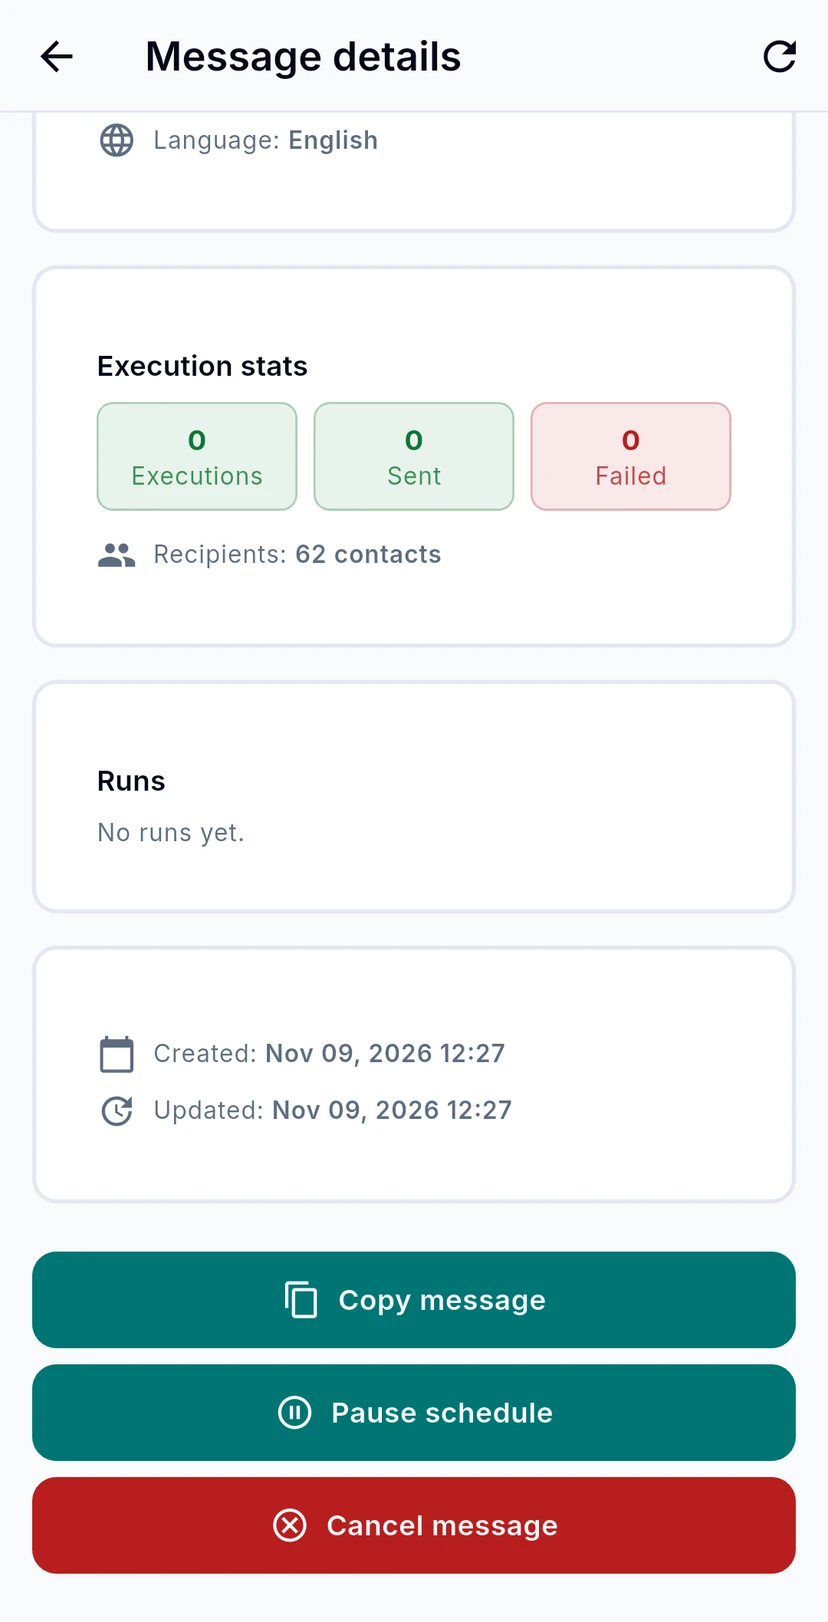
At the bottom, Runs lists each time it went out. Copy message starts a new schedule from this one, Pause schedule stops it until you resume it, and Cancel message stops it for good.
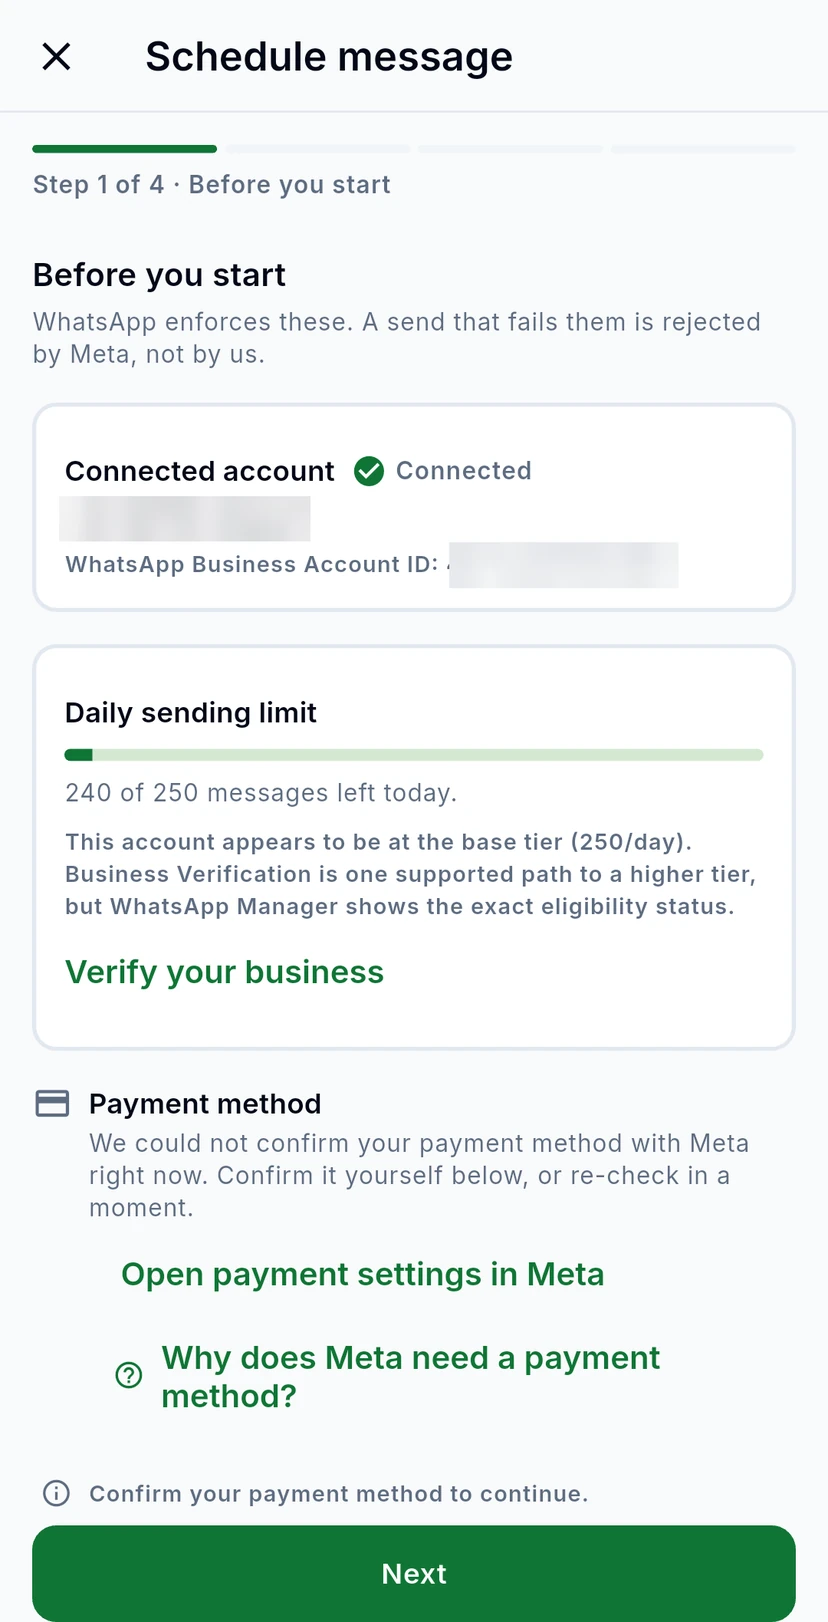
Tap New scheduled message. The first three steps work like a bulk campaign: Before you start checks your number, daily limit and payment method with Meta, then you pick a template, fill its variables and choose your recipients.
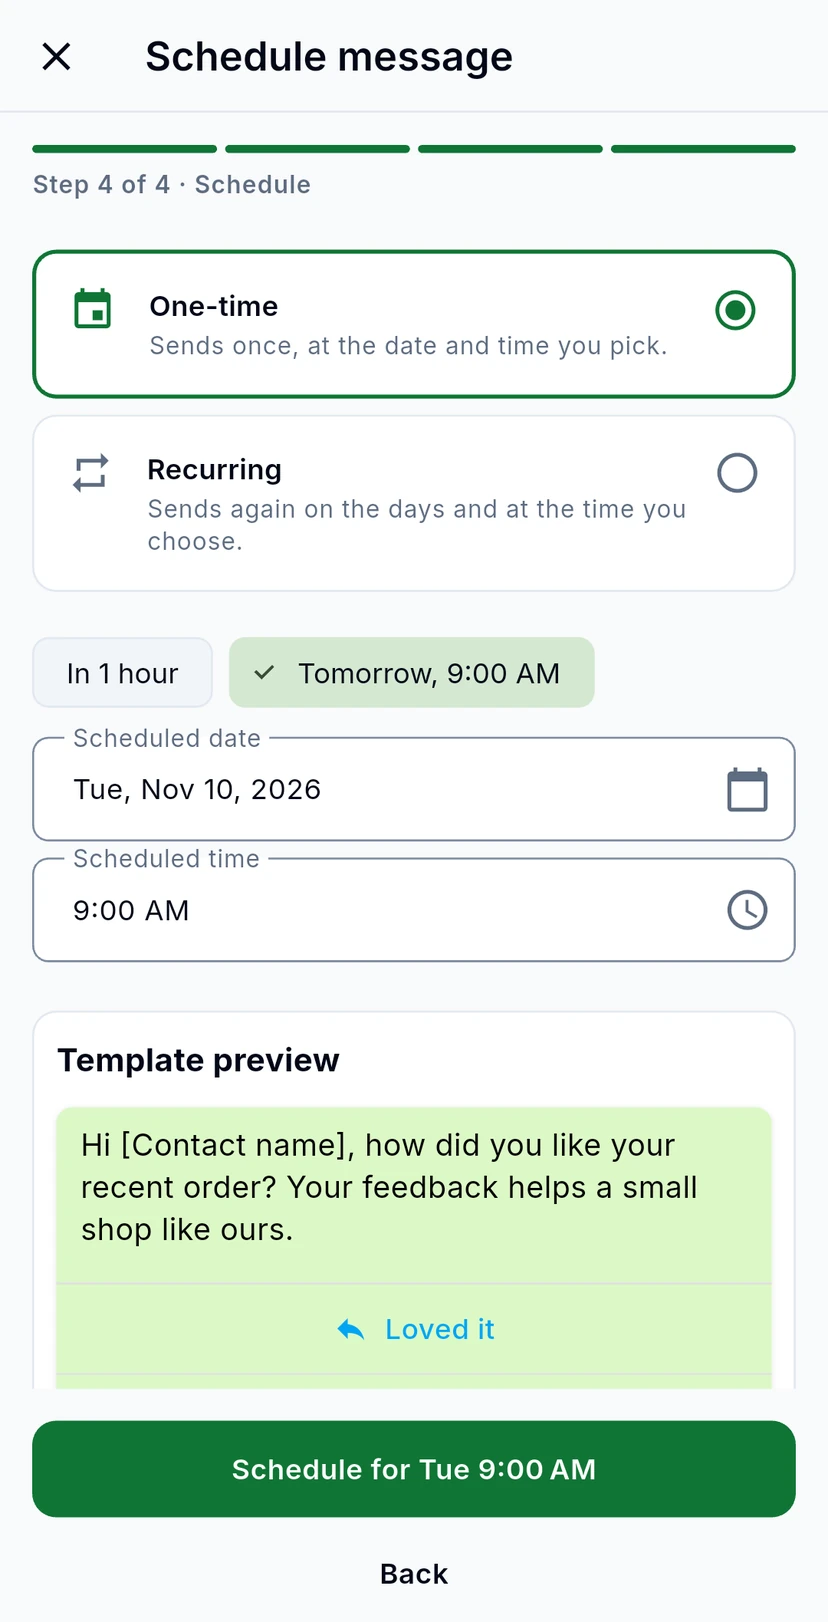
Choose One-time, then pick the Scheduled date and Scheduled time, or tap a shortcut such as In 1 hour or Tomorrow, 9:00 AM.
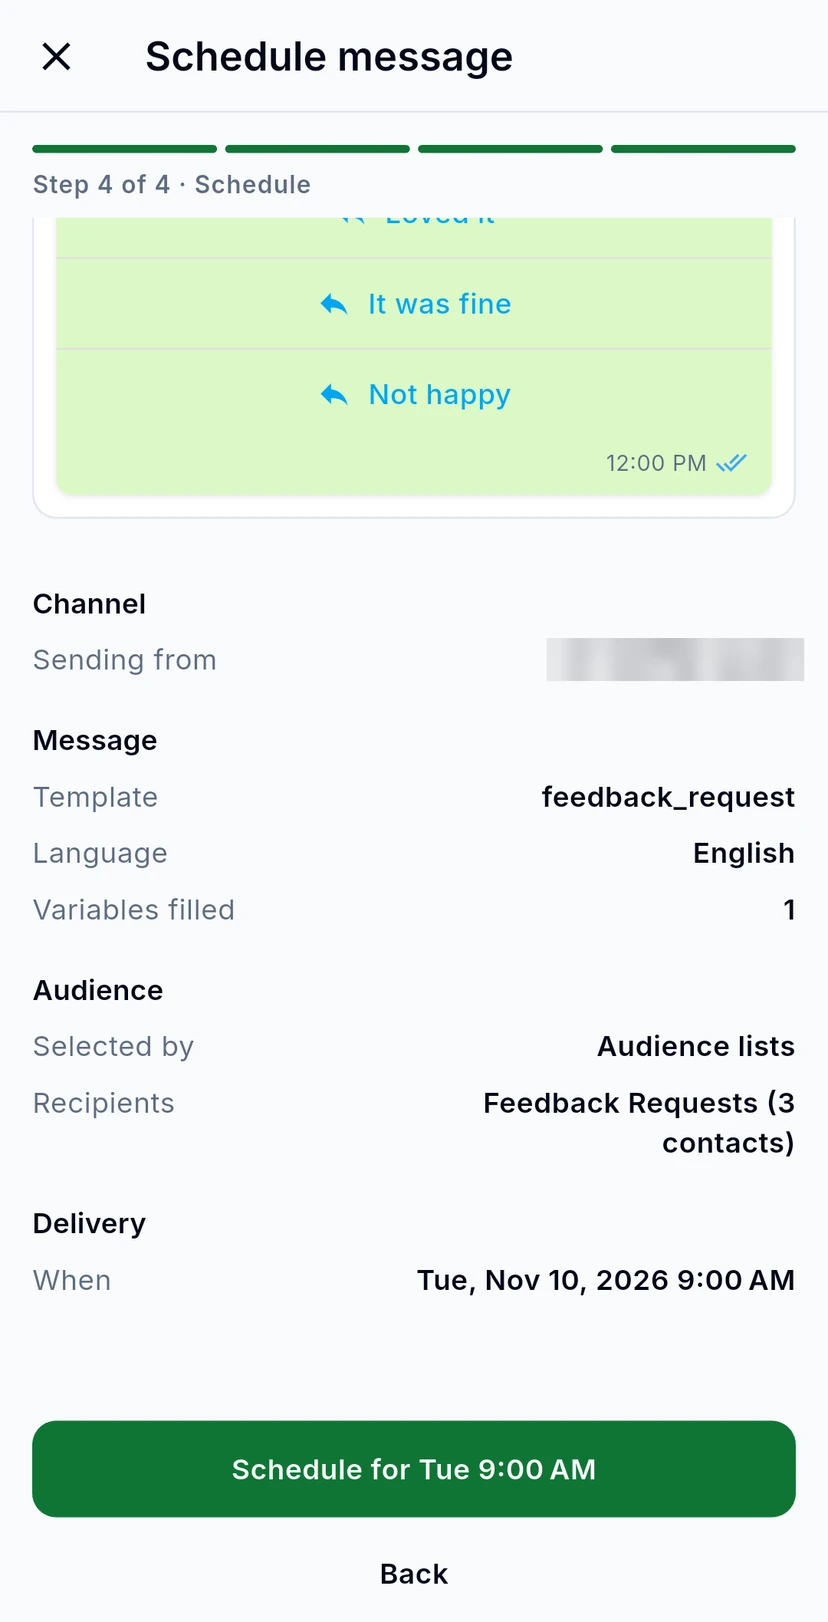
Scroll down for the summary: the number it is sent from, the template, the audience and when it goes out. The green button names the time, for example Schedule for Tue 9:00 AM: tap it to schedule. To leave without scheduling, tap the X at the top and Discard.
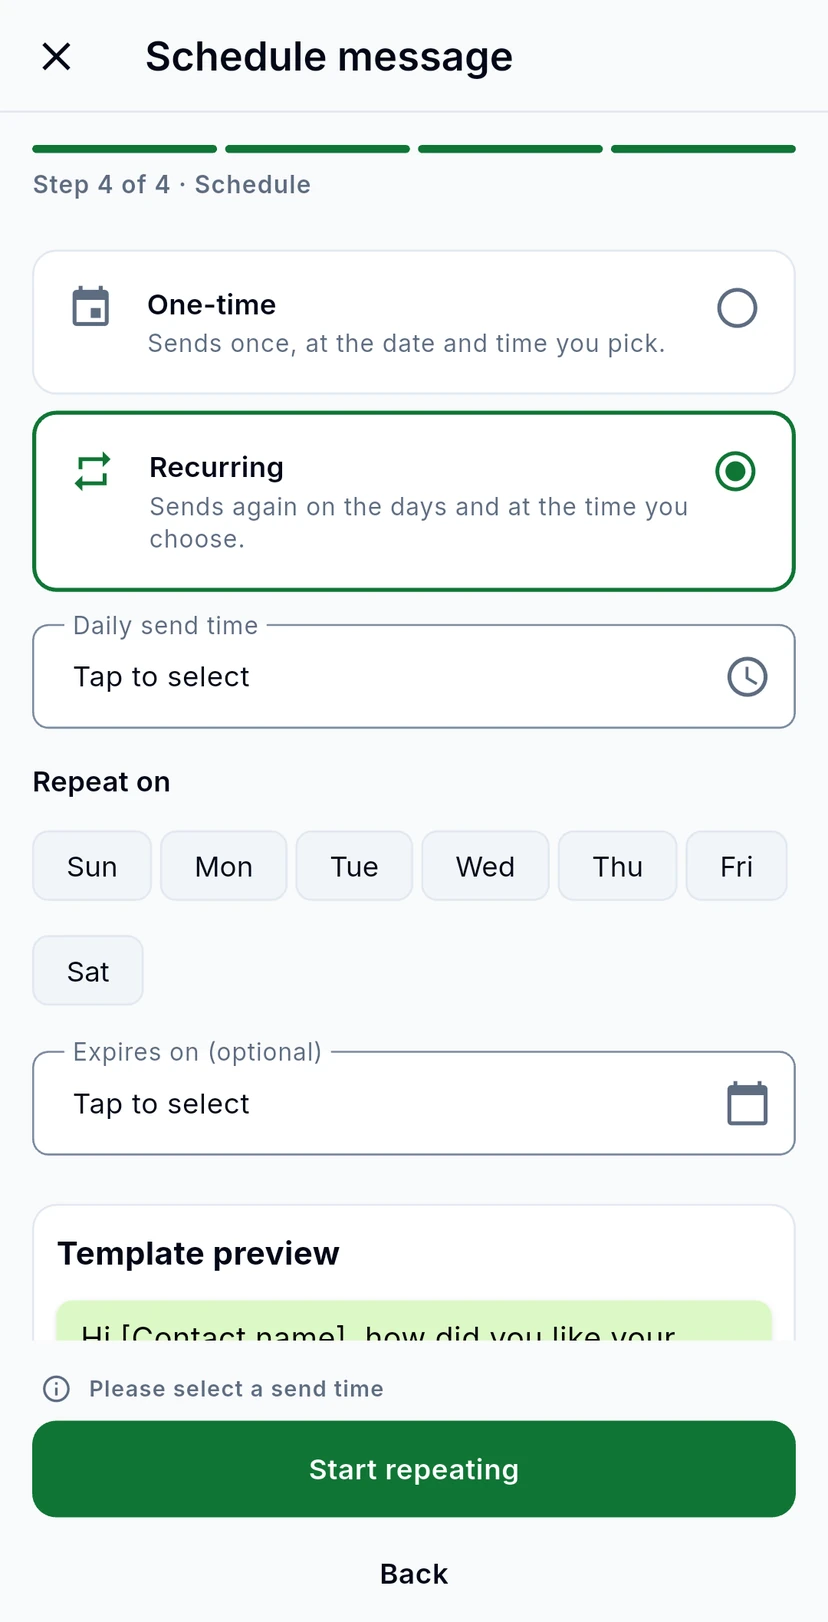
Choose Recurring to send it again and again. Set the Daily send time, tap the days under Repeat on, and if it should stop on a certain date, set Expires on (optional). Then tap Start repeating.