Groups and contacts
A group is a named list of contacts you can message together — a festive campaign, your VIP customers, everyone who abandoned a cart. This guide covers the whole module: building a list by hand, importing one from a spreadsheet, exporting it back out, and keeping it tidy afterwards. Groups are not tied to a WhatsApp account; you choose the account when you send.
Your groups at a glance
The list
Every group you own, newest activity first. The four counters along the top are live: Total Members counts real membership rows across all your groups, not the number cached on each card. A group with no members can exist happily — it just cannot be messaged until it has some.
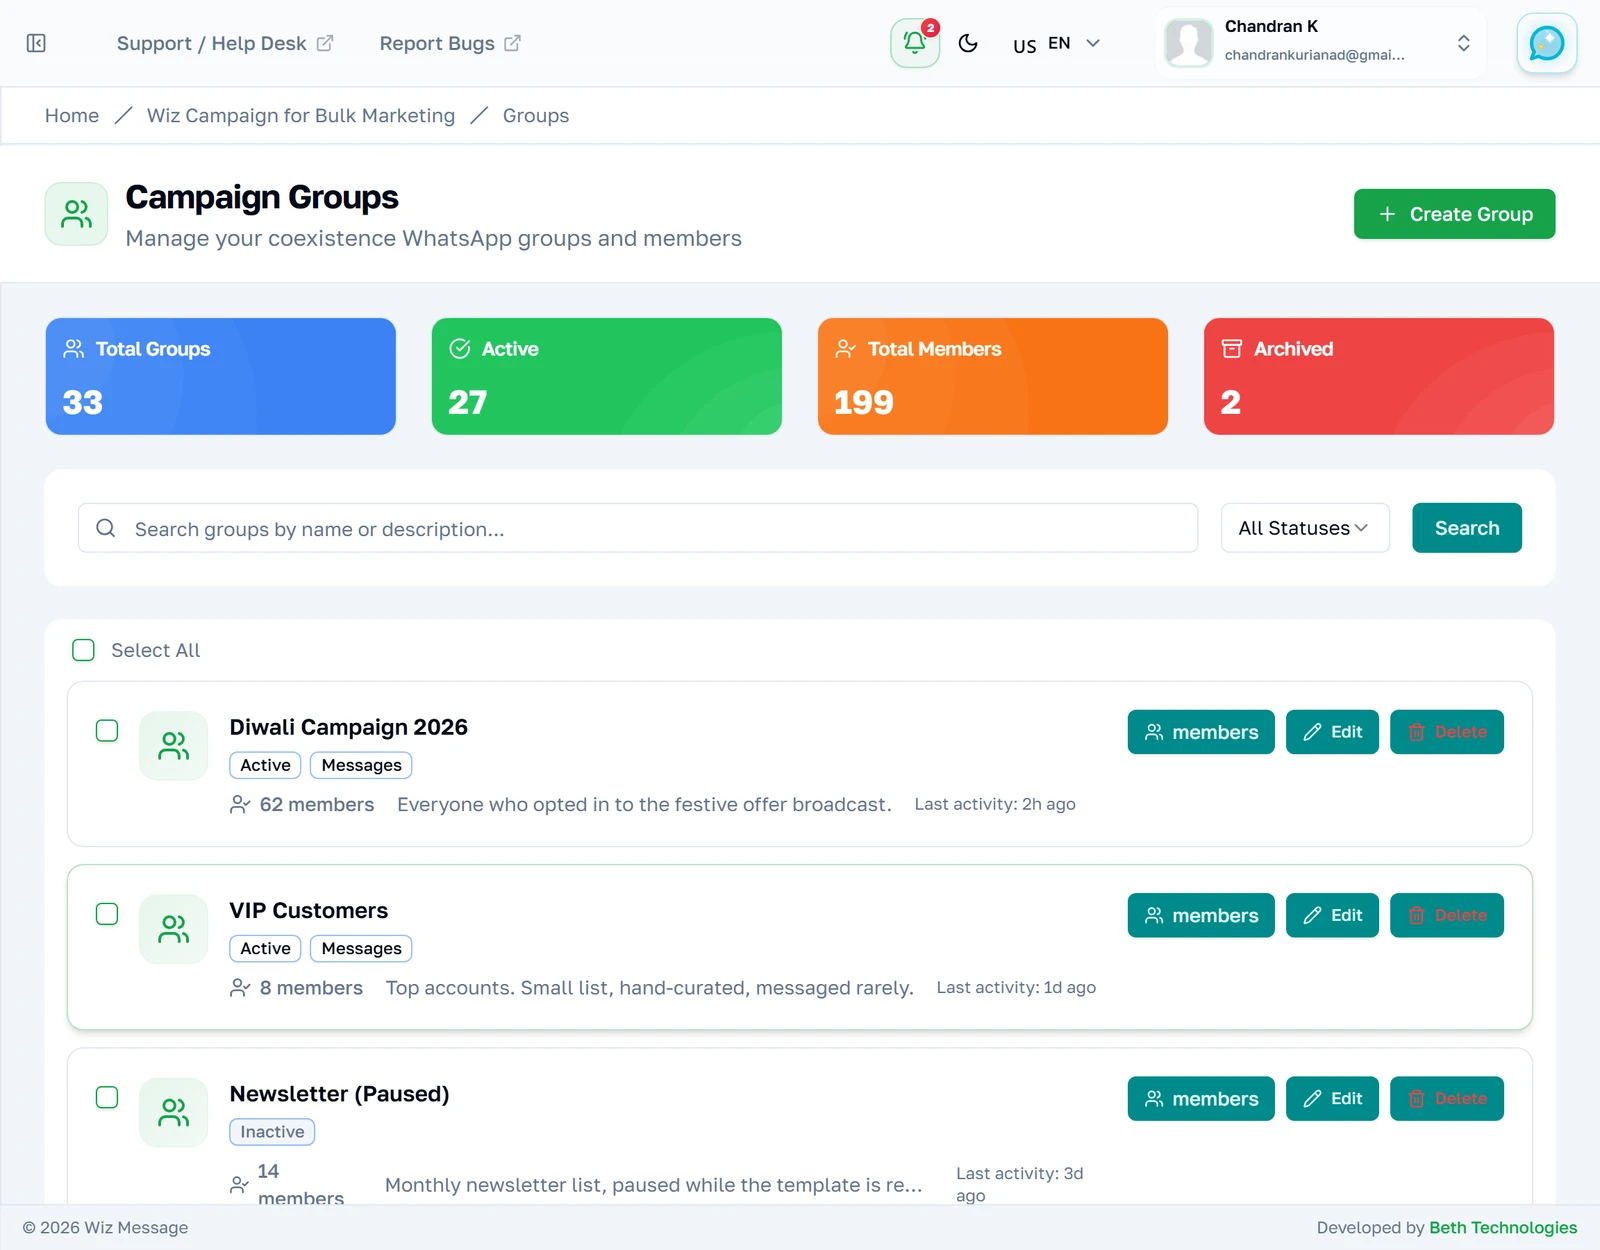
Reading the four counters
Total Groups counts every group whatever its status. It will usually be larger than Active plus Archived, because there is no tile for Inactive — in this account 33 groups are 27 active, 2 archived and 4 inactive, and the four have nowhere to appear. Total Members counts real membership rows across every group, so a contact in three groups is counted three times. Status is a label you set yourself: nothing stops you messaging an archived group, it just keeps the list honest.

Filtering by status
The status dropdown narrows the list to one kind of group. Open it and pick the one you want to see.
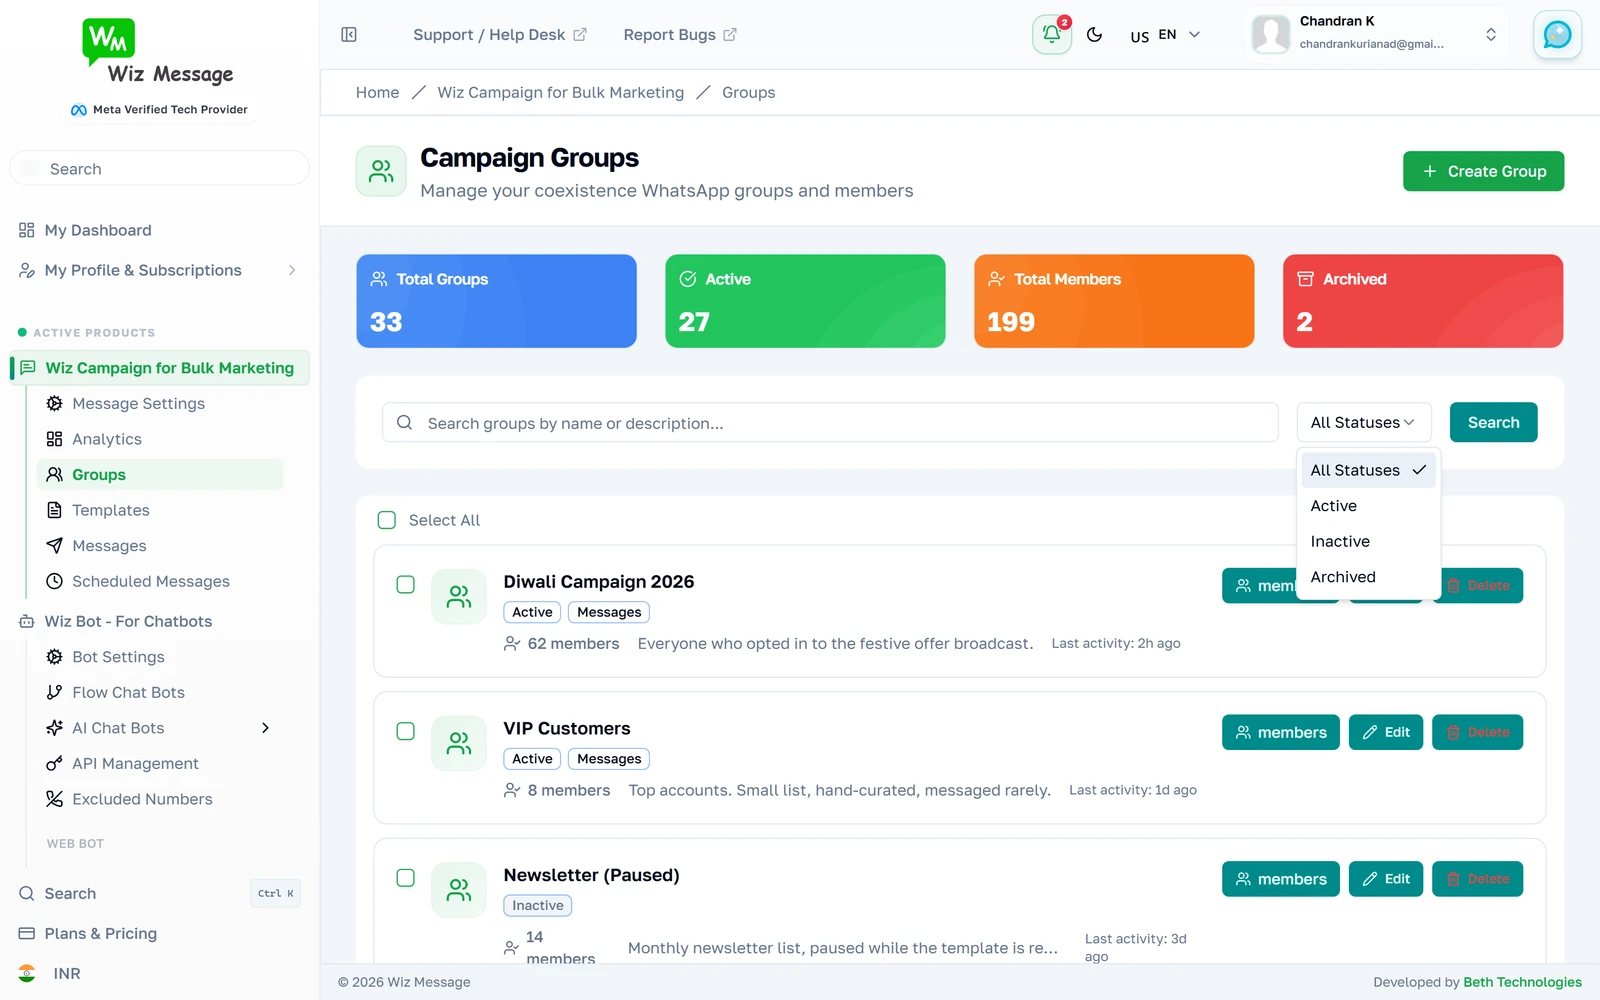
Only the archived ones
Choosing a status reloads the list immediately — there is no second Apply step. The counters above do not change: they always describe your whole account, never the filtered view.
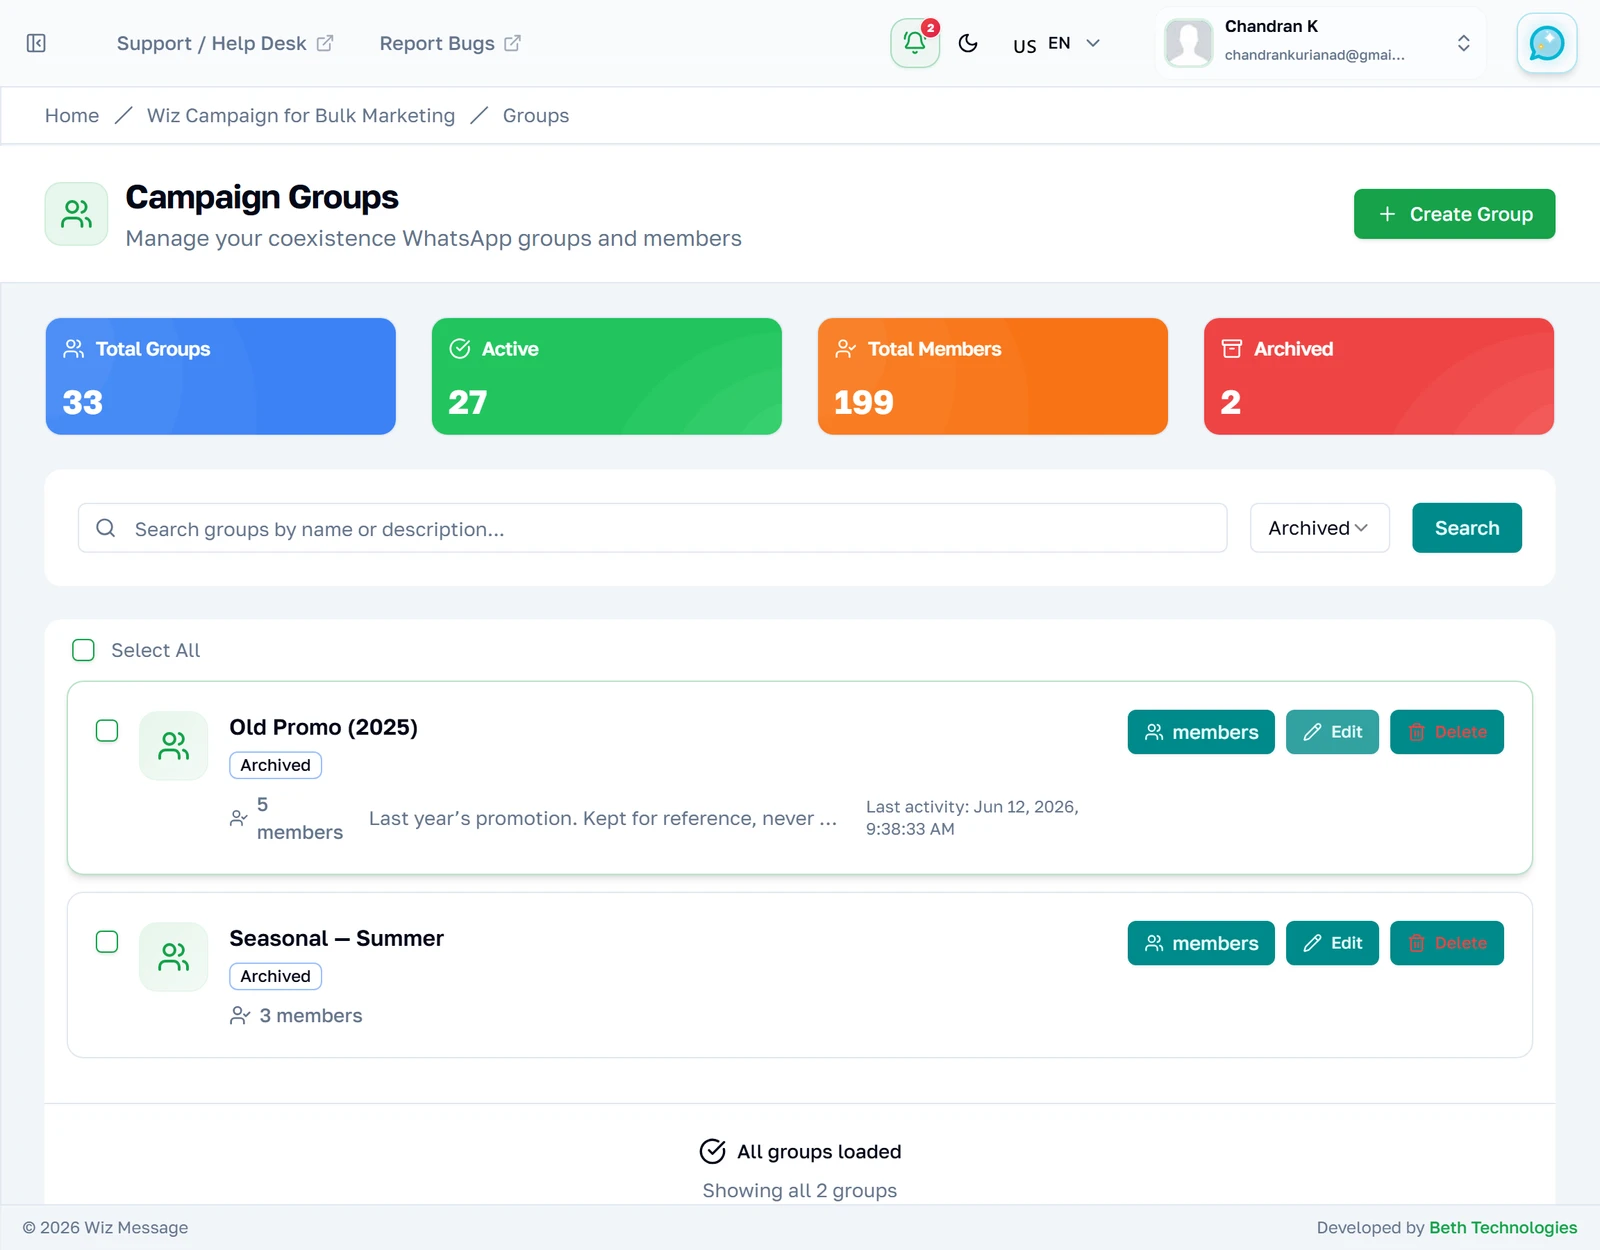
Searching
Search matches the group name and its description, so a group you named cryptically is still findable by what you wrote about it. Type and press Enter, or press Search. Search and the status filter combine.
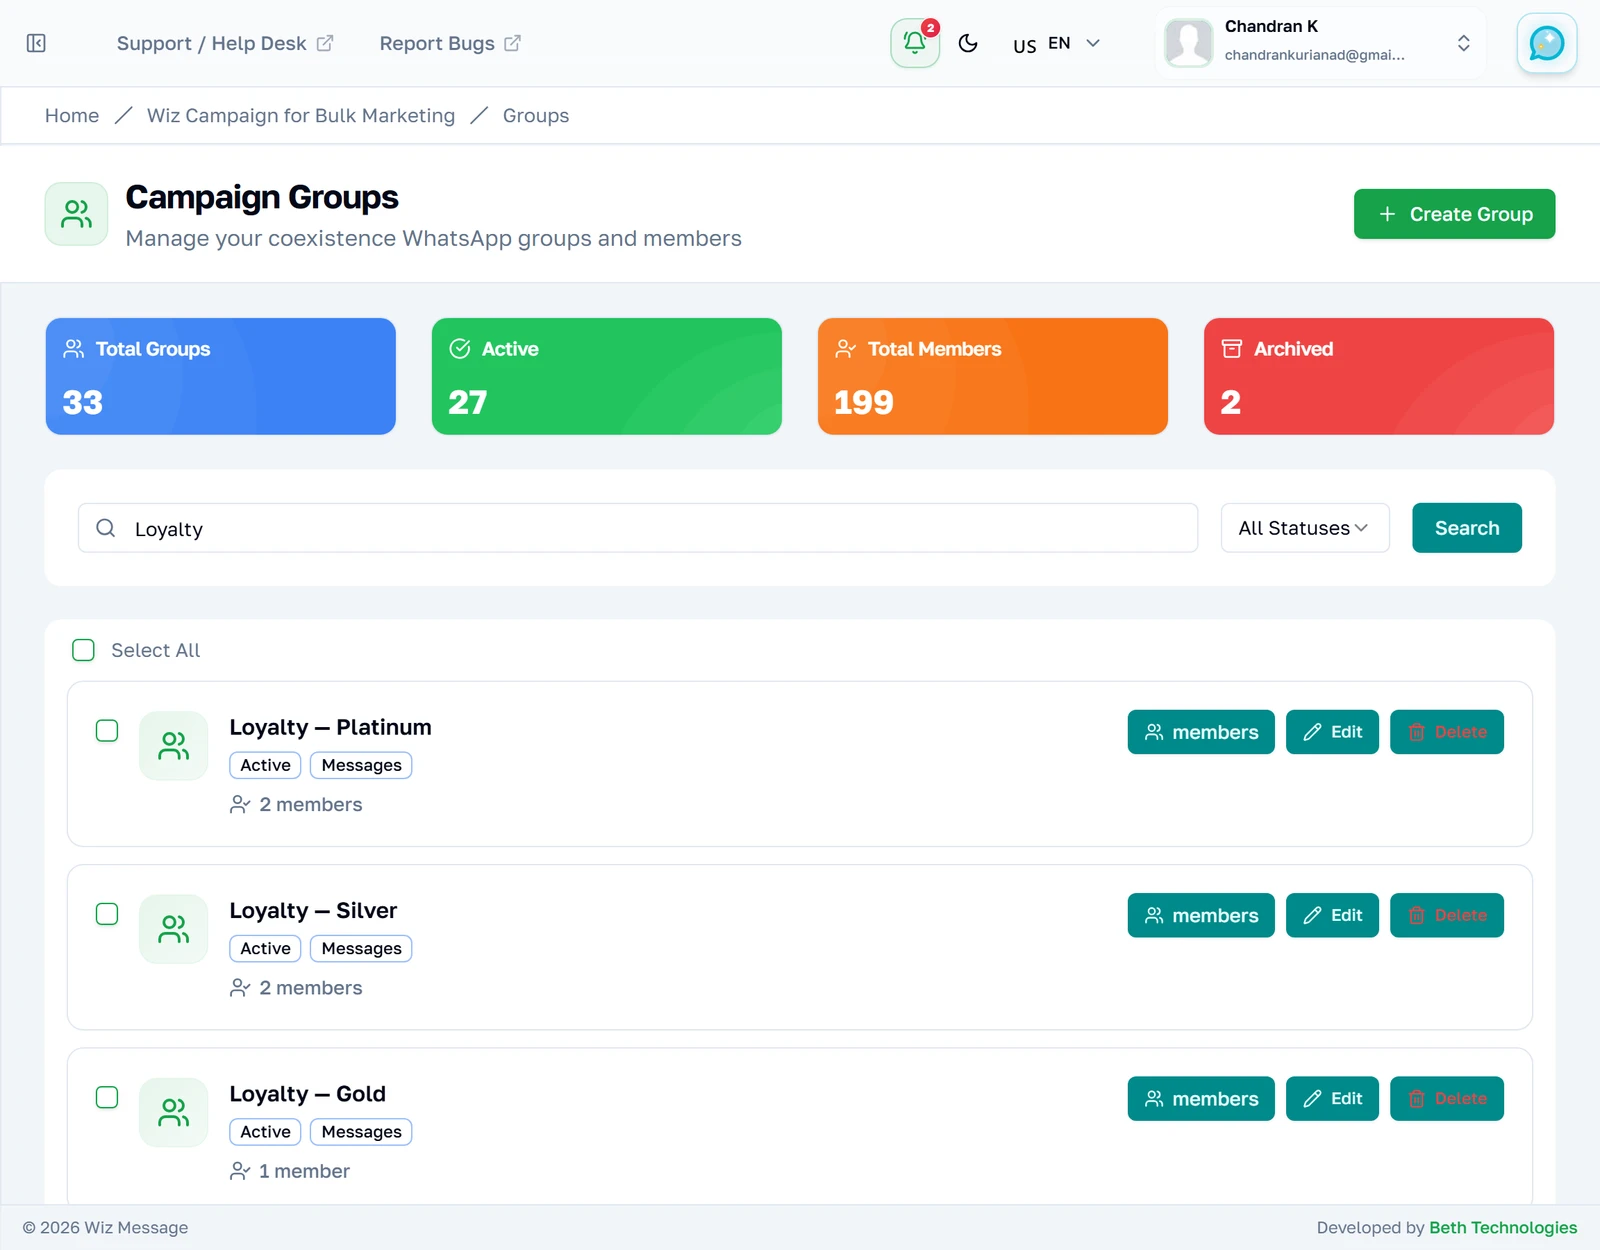
Selecting groups unlocks two more buttons
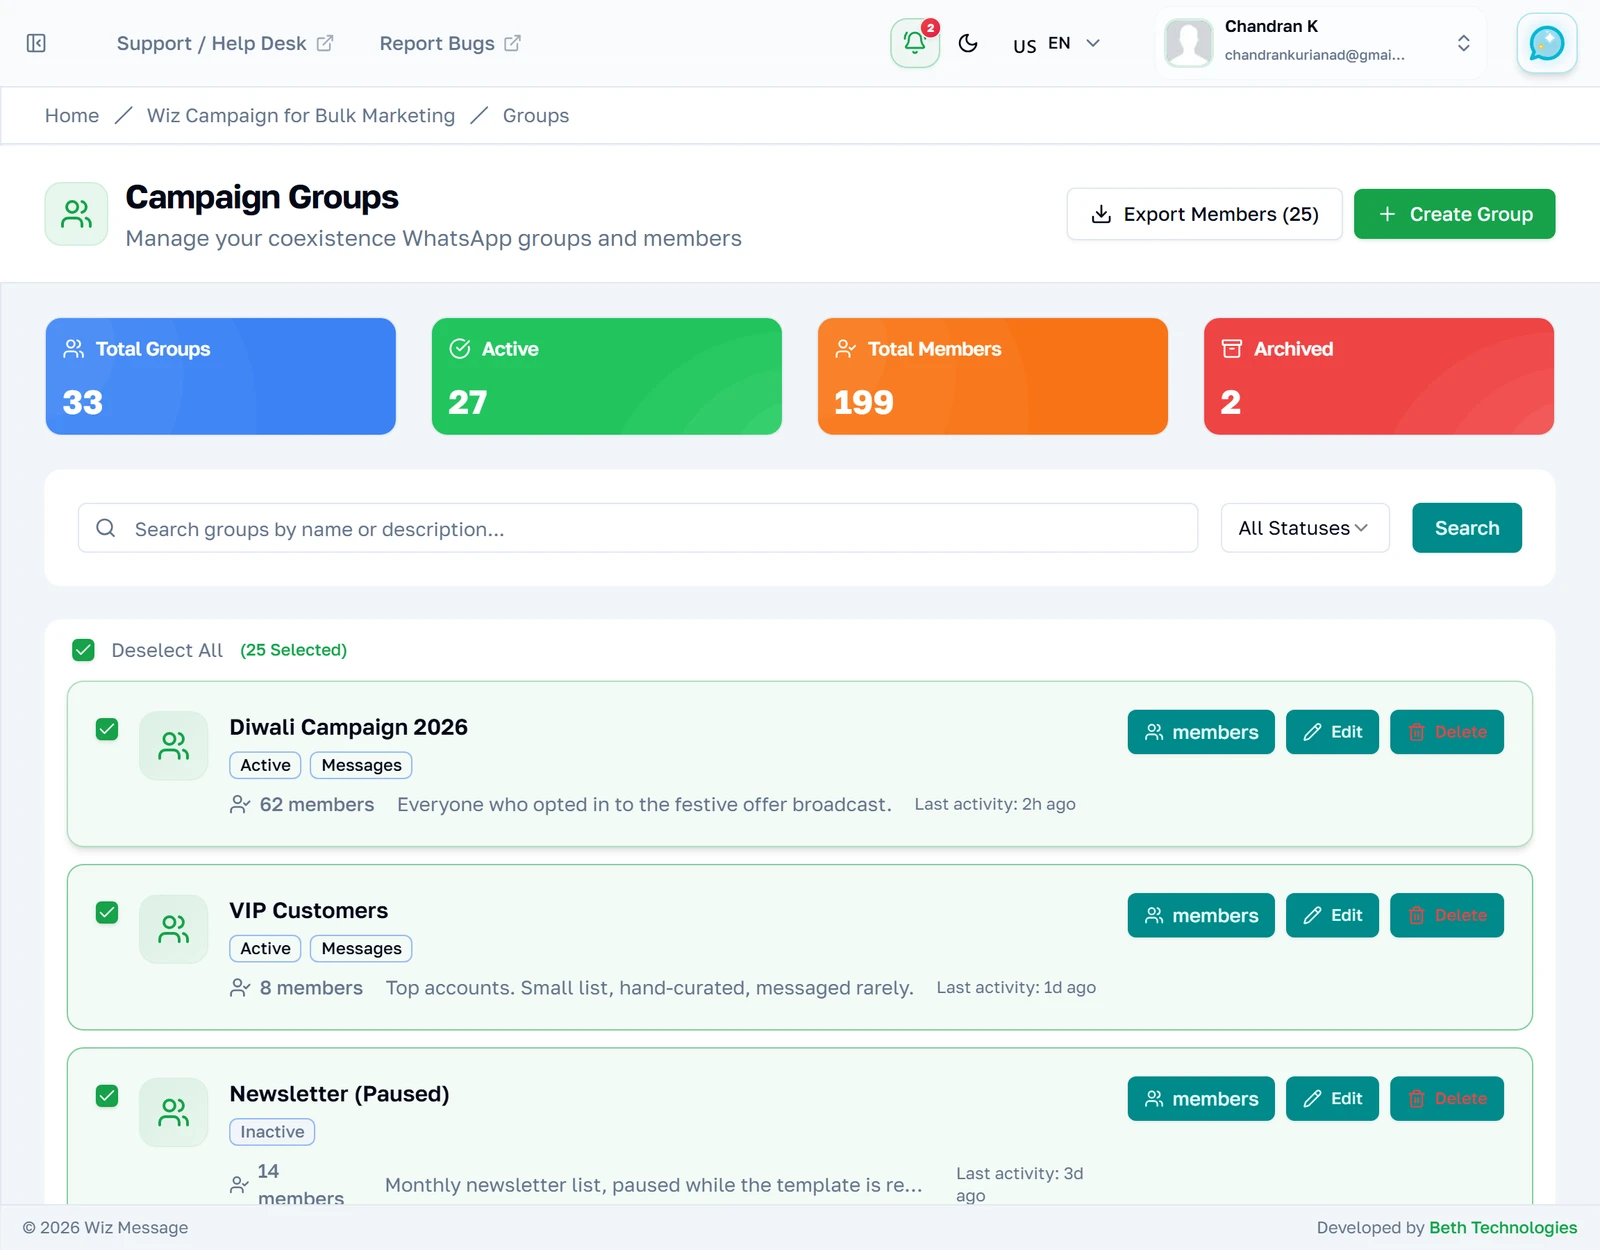
Tick one or more groups and an Export Members button appears at the top, carrying the number you picked. Export gives you one workbook with a worksheet per group. Nothing is selected by default, and the selection is forgotten when you leave the page.
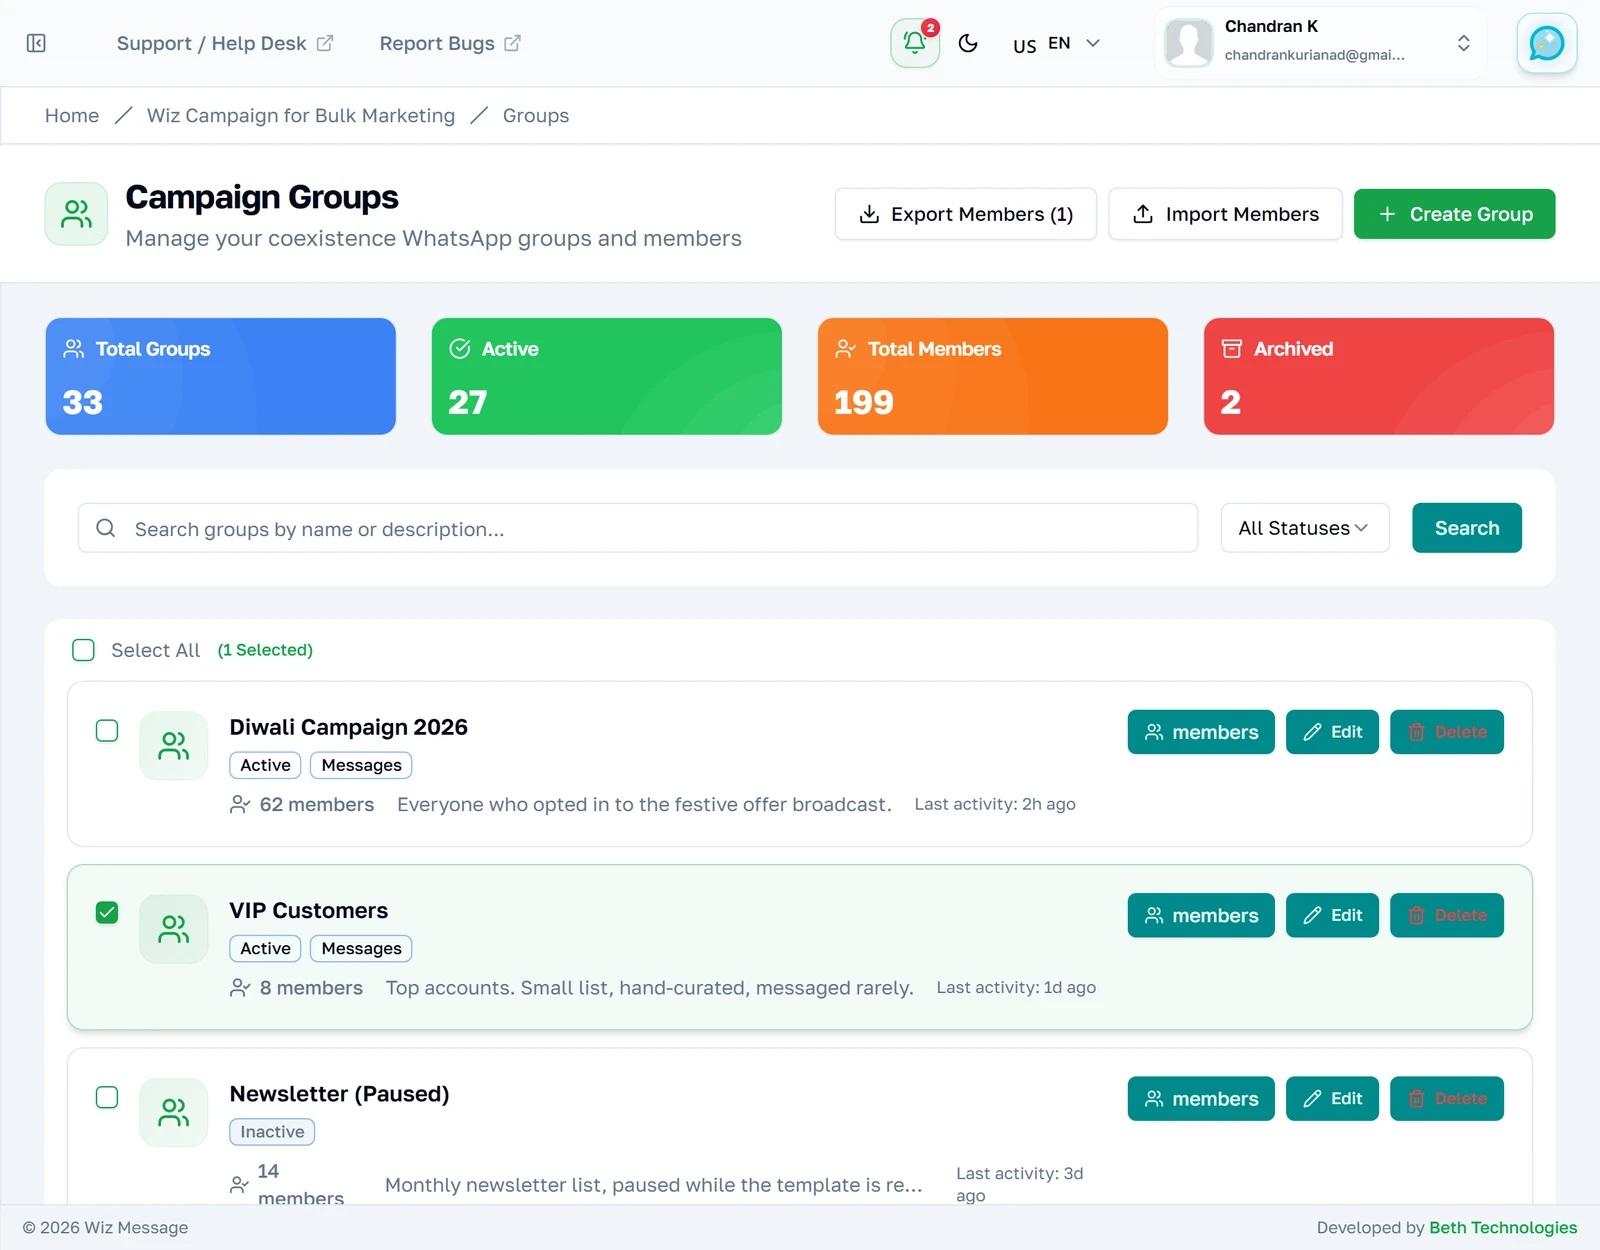
Import Members only appears at exactly one selection
Deselect everything, tick a single group, and a second button appears beside Export. Import Members is a shortcut to that group's Add Members screen — it does not import anything by itself, and it is hidden again the moment you tick a second group, because an import has to land in one group.
Long lists load in pages of 25
The list does not scroll forever. Twenty-five groups arrive with the page and the rest come on request, so the counter underneath tells you exactly where you are.

When there is nothing left to load
Press Load More and the rest append below; the button is replaced by a confirmation that you are looking at everything. The bracketed page count beside that confirmation is mislabelled.

Deleting a group — read this box carefully
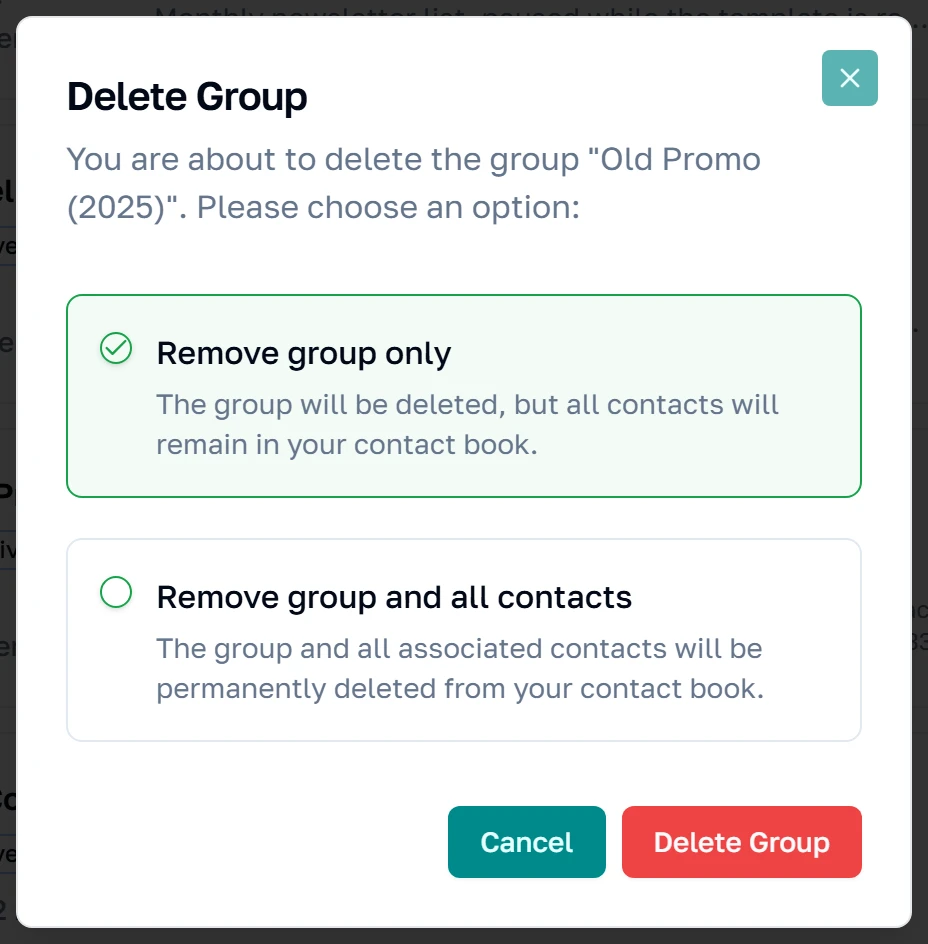
The two options are not variations on a theme. Remove group only deletes the list and leaves every contact in your contact book, which is almost always what you want. Remove group and all contacts permanently deletes those contact records from your account — they disappear from every other group they belonged to, and from your contact book entirely. There is no undo and no second confirmation.
Creating a group
The form
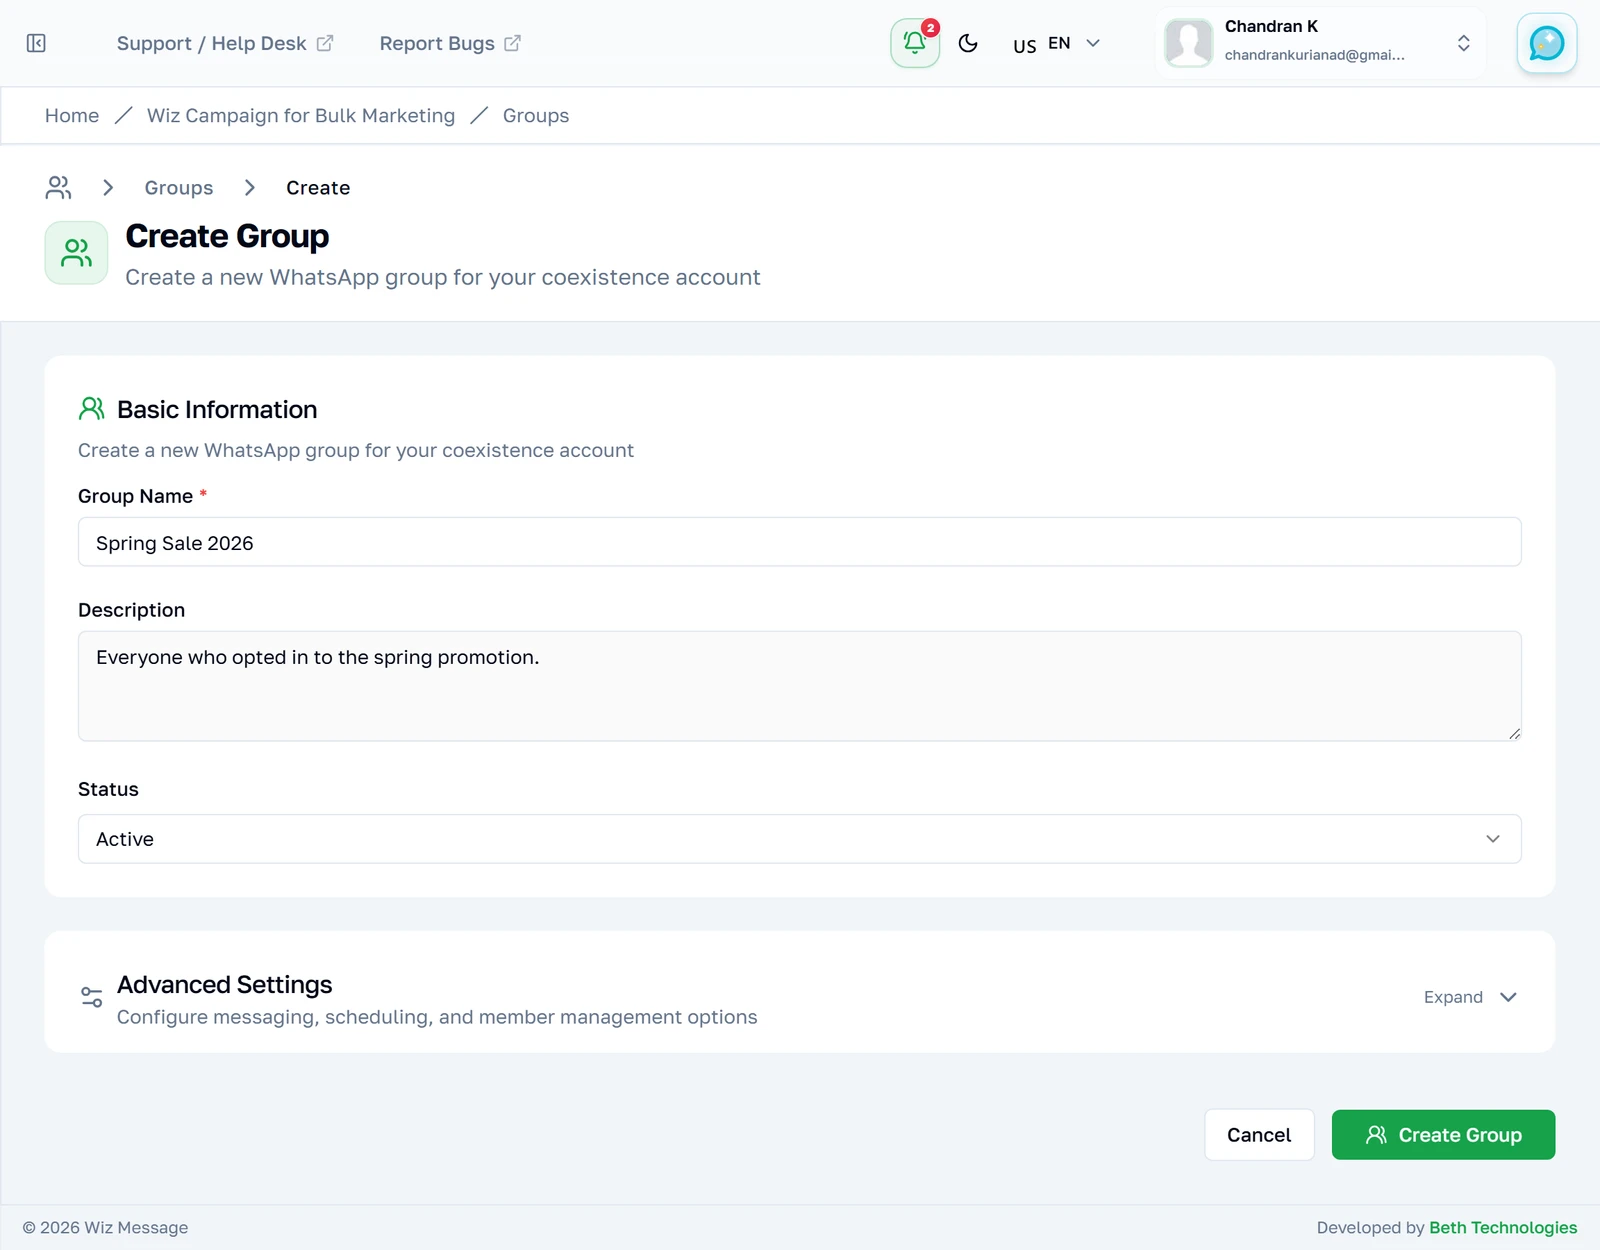
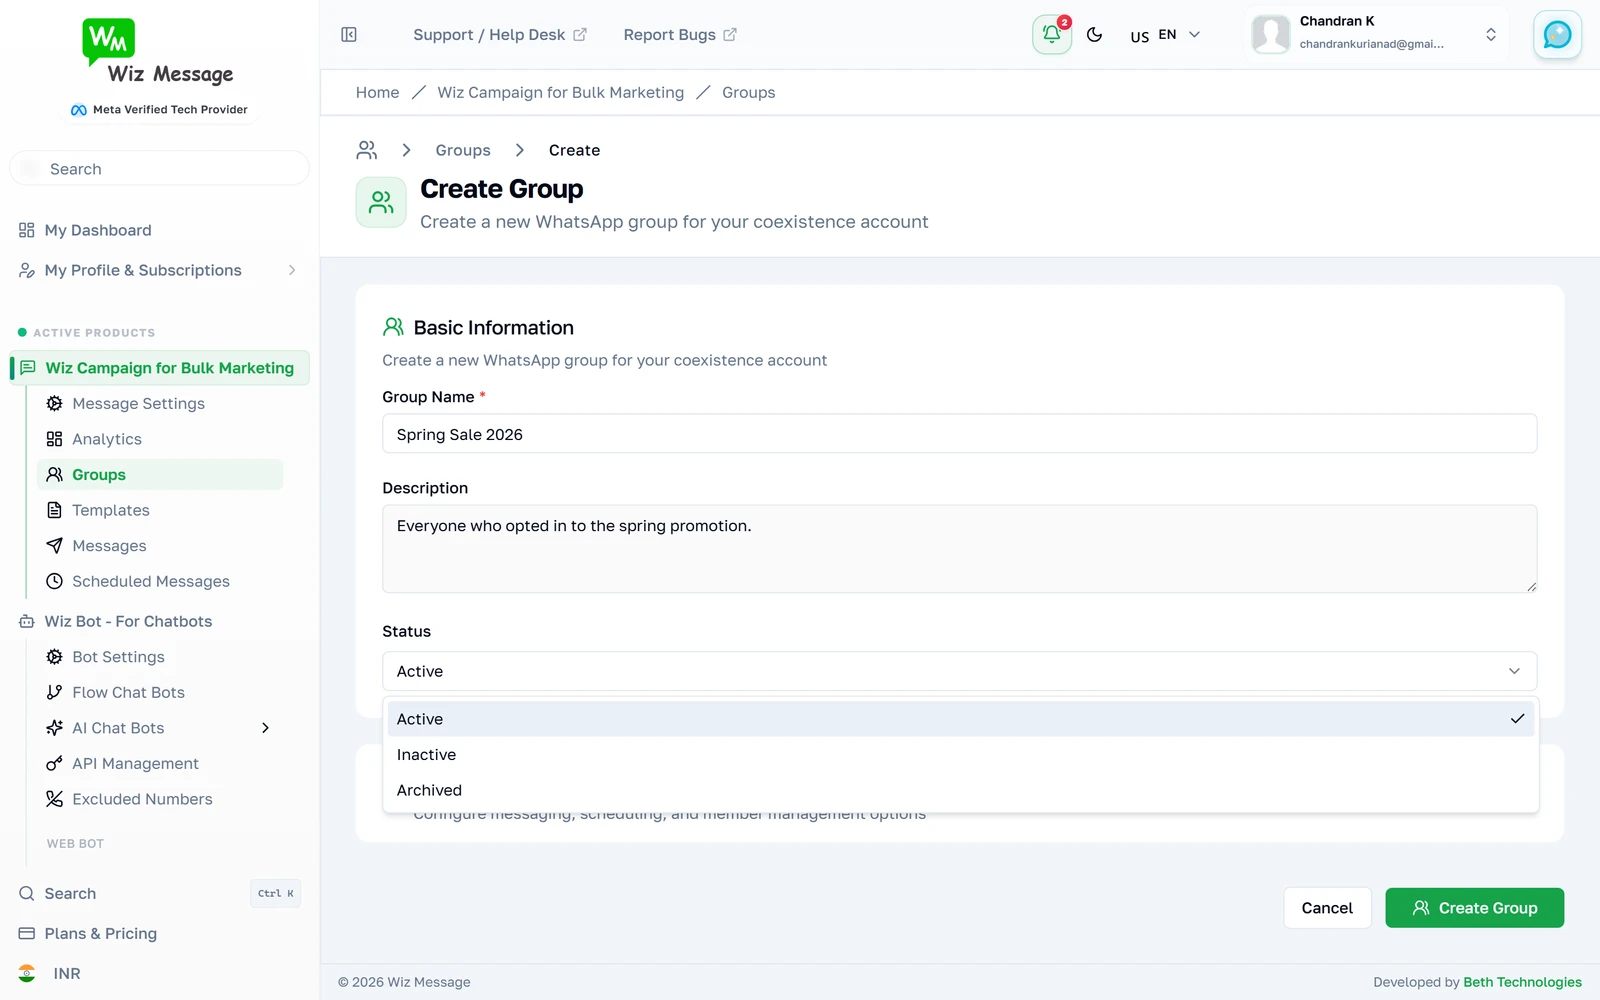
A name is the only thing required — two characters minimum, a hundred maximum. The description is worth filling in because search reads it. You are not asked which WhatsApp account the group belongs to: groups are account-independent, and the account is chosen when you send.
Status at creation
New groups default to Active. Choosing Inactive or Archived here is the same setting you can change later from Edit — it is a label for your own housekeeping, not a permission.
Advanced settings
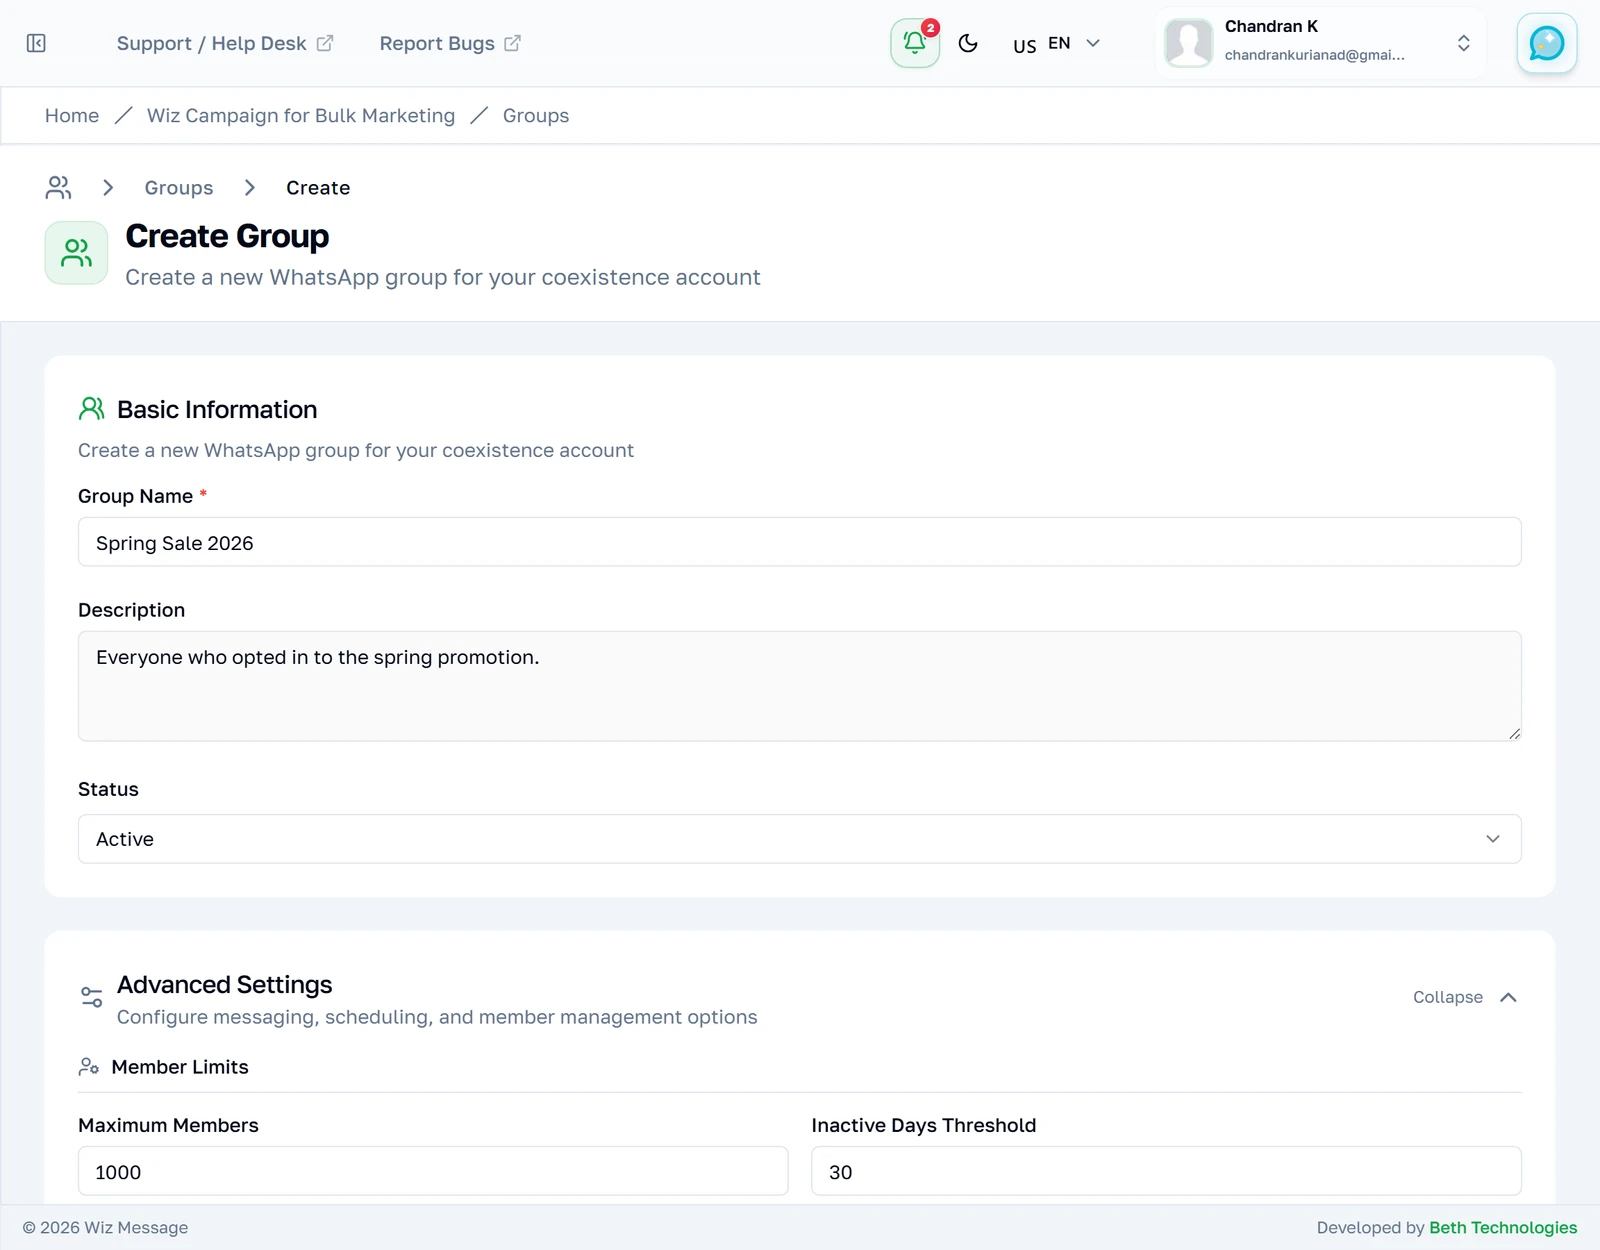
Collapsed by default and safe to ignore. Maximum Members and the inactivity threshold are recorded against the group; Auto-remove Inactive Members is the switch that would act on them. Leave the section closed unless you have a reason to open it.
Opening and editing a group
The group page
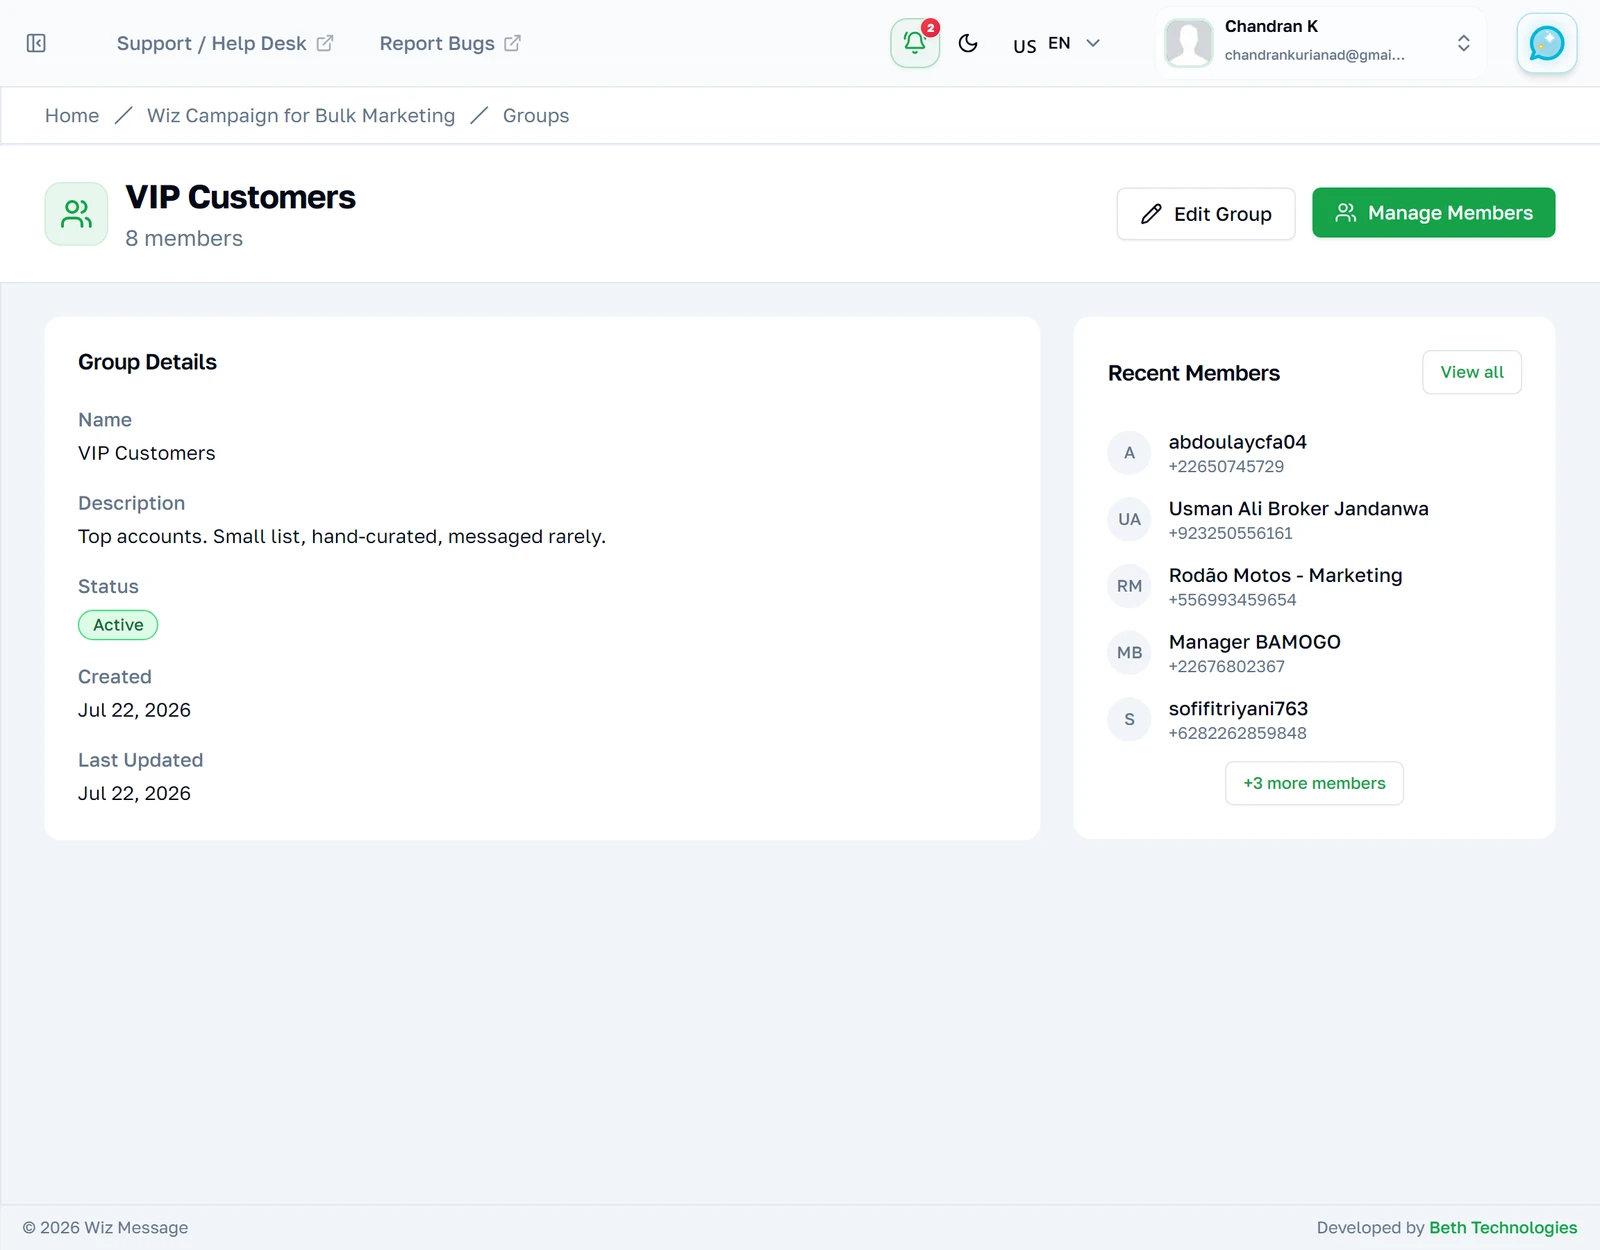
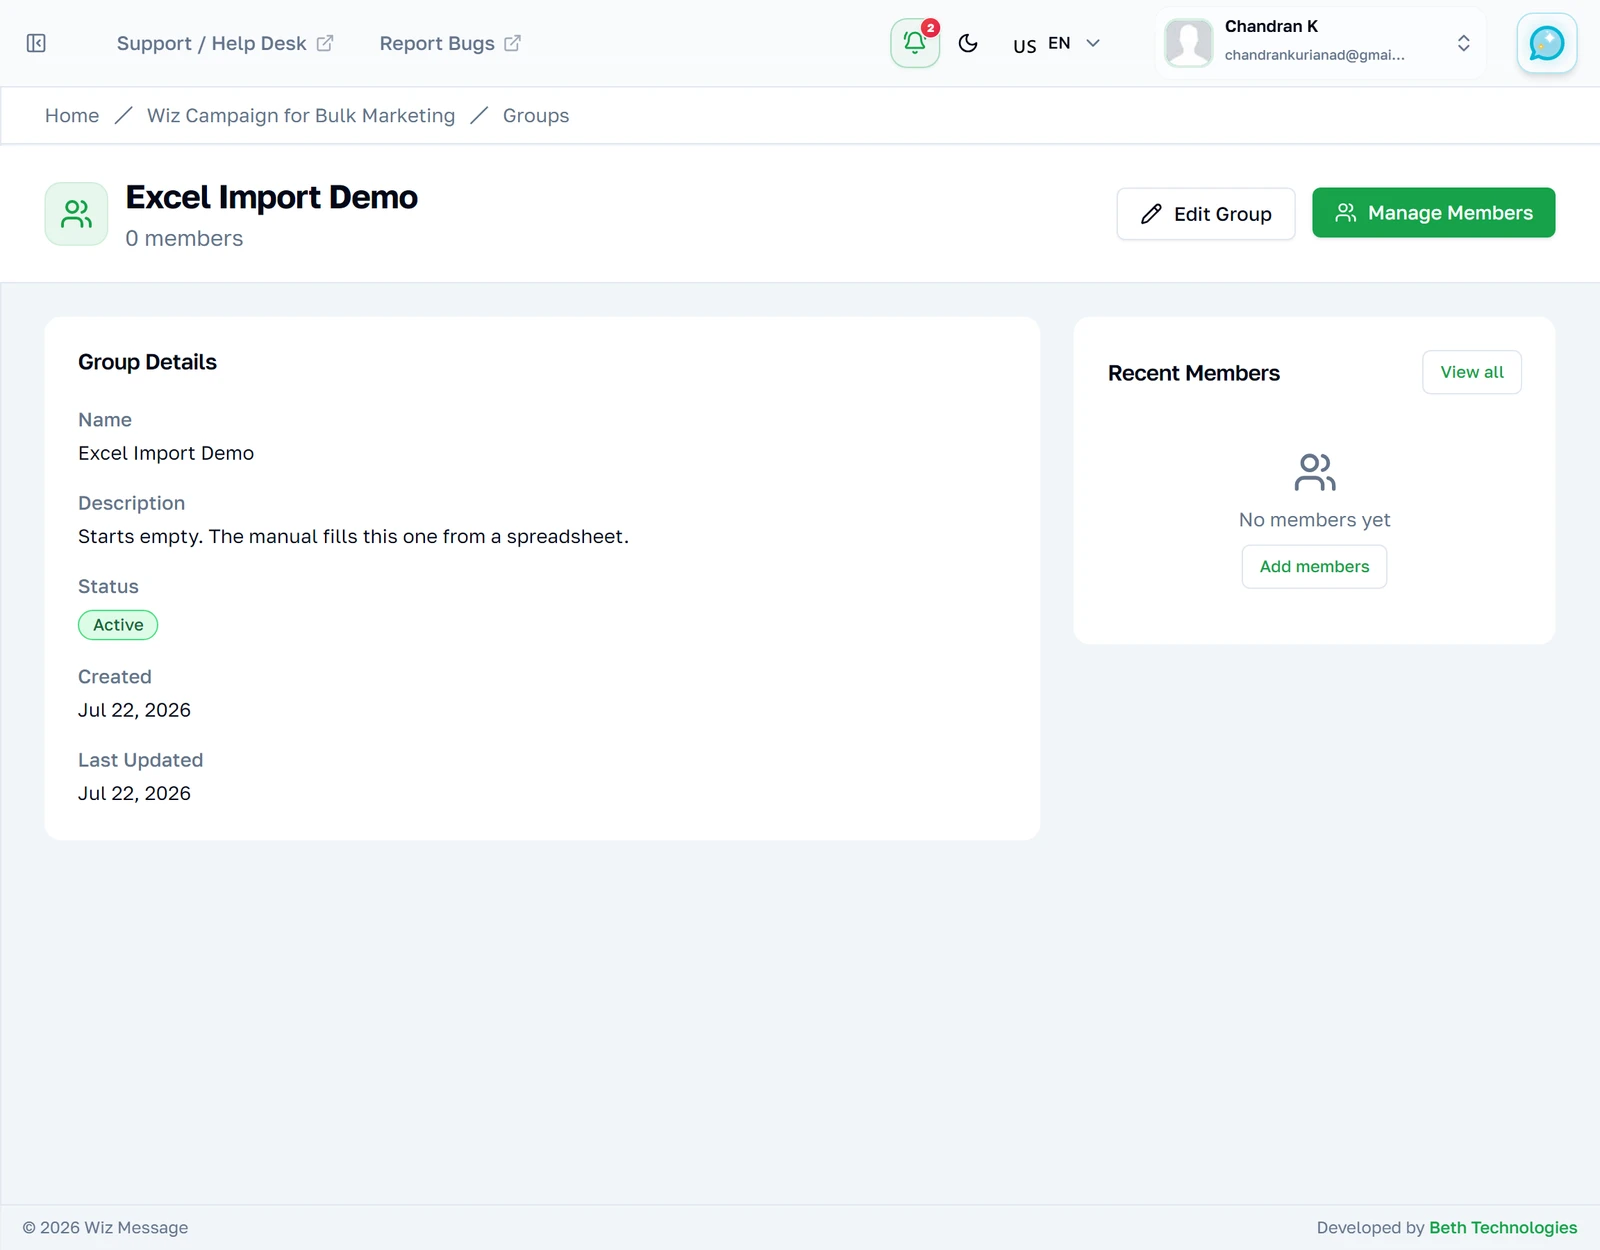
Details on the left, the five most recently added members on the right. This page is a summary, not a workspace — everything you can change lives behind Edit Group, and everything to do with the membership lives behind Manage Members.
Recent members
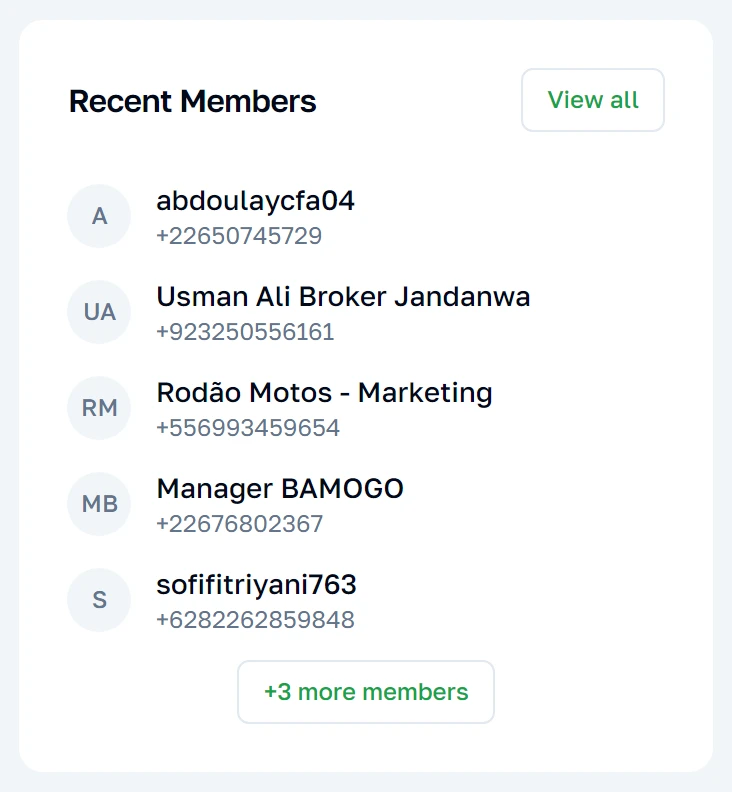
Five at most, newest first, with a link to the rest. Recent means recently added to this group — not recently messaged, and not recently created as a contact.
A group with nobody in it
A brand-new group looks like this. It is a perfectly valid state — the group exists, it just has nothing to message. Both links go to the same place.
Editing
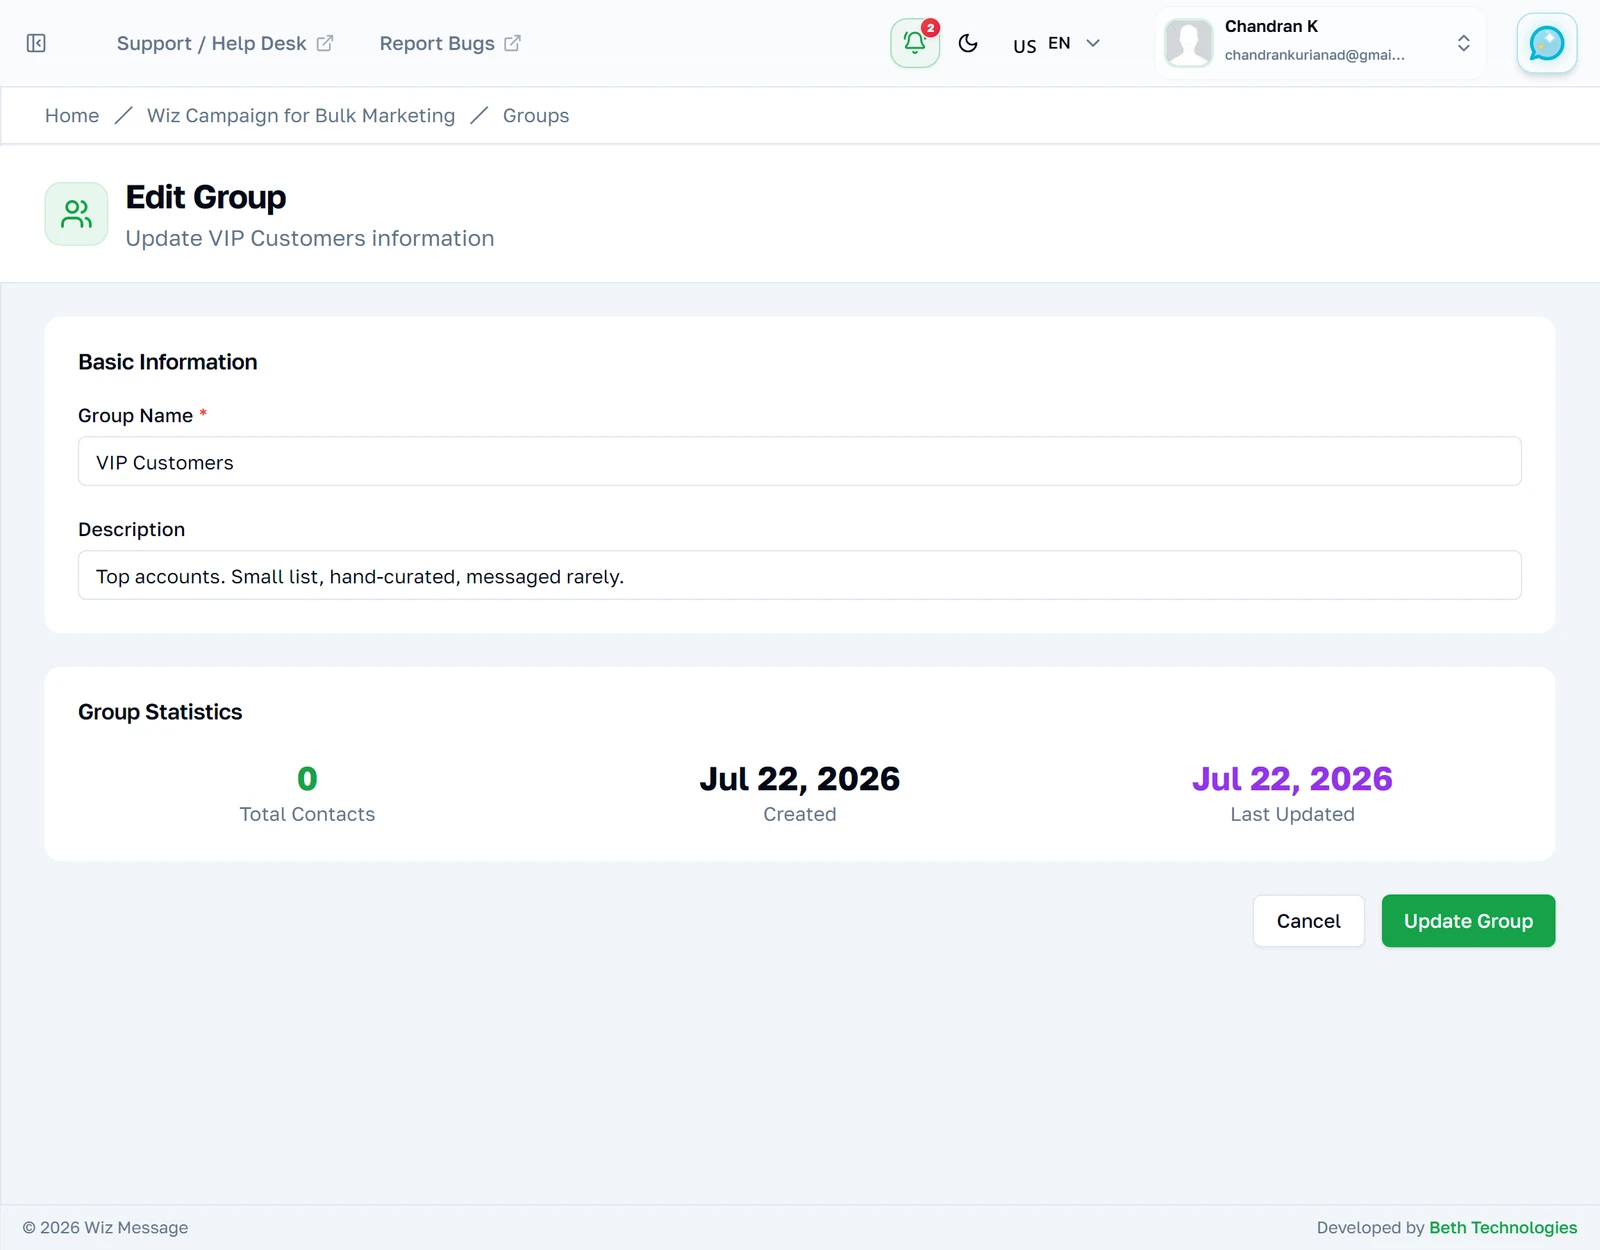
Name, description and status, and nothing else. Renaming a group is safe: the address uses an id, not the name, so links and exports keep working. Changing the status never touches the membership.
Managing members
The member list
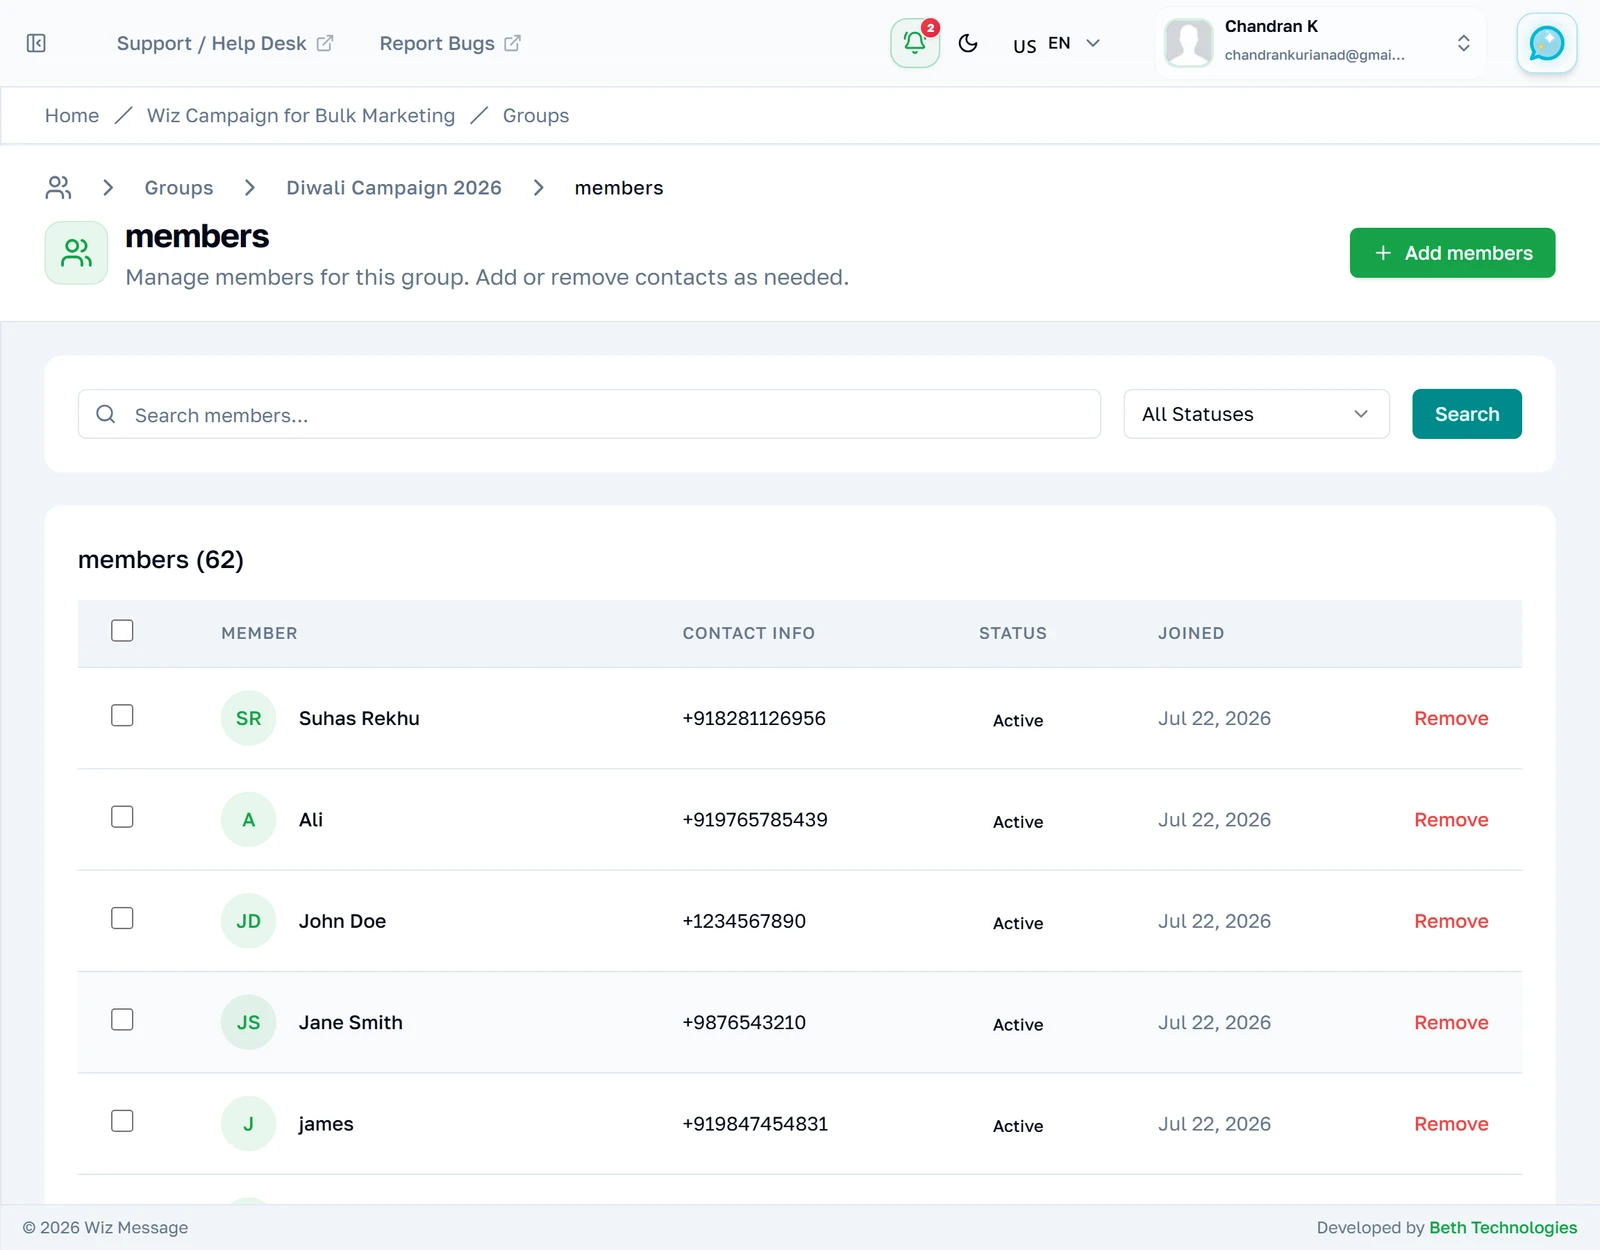
Fifty members to a page. The Joined column is when the contact was added to this group, which is usually not when the contact was created. Status is the status of the contact in your account, so a contact marked inactive shows as inactive in every group it belongs to.
Finding one member
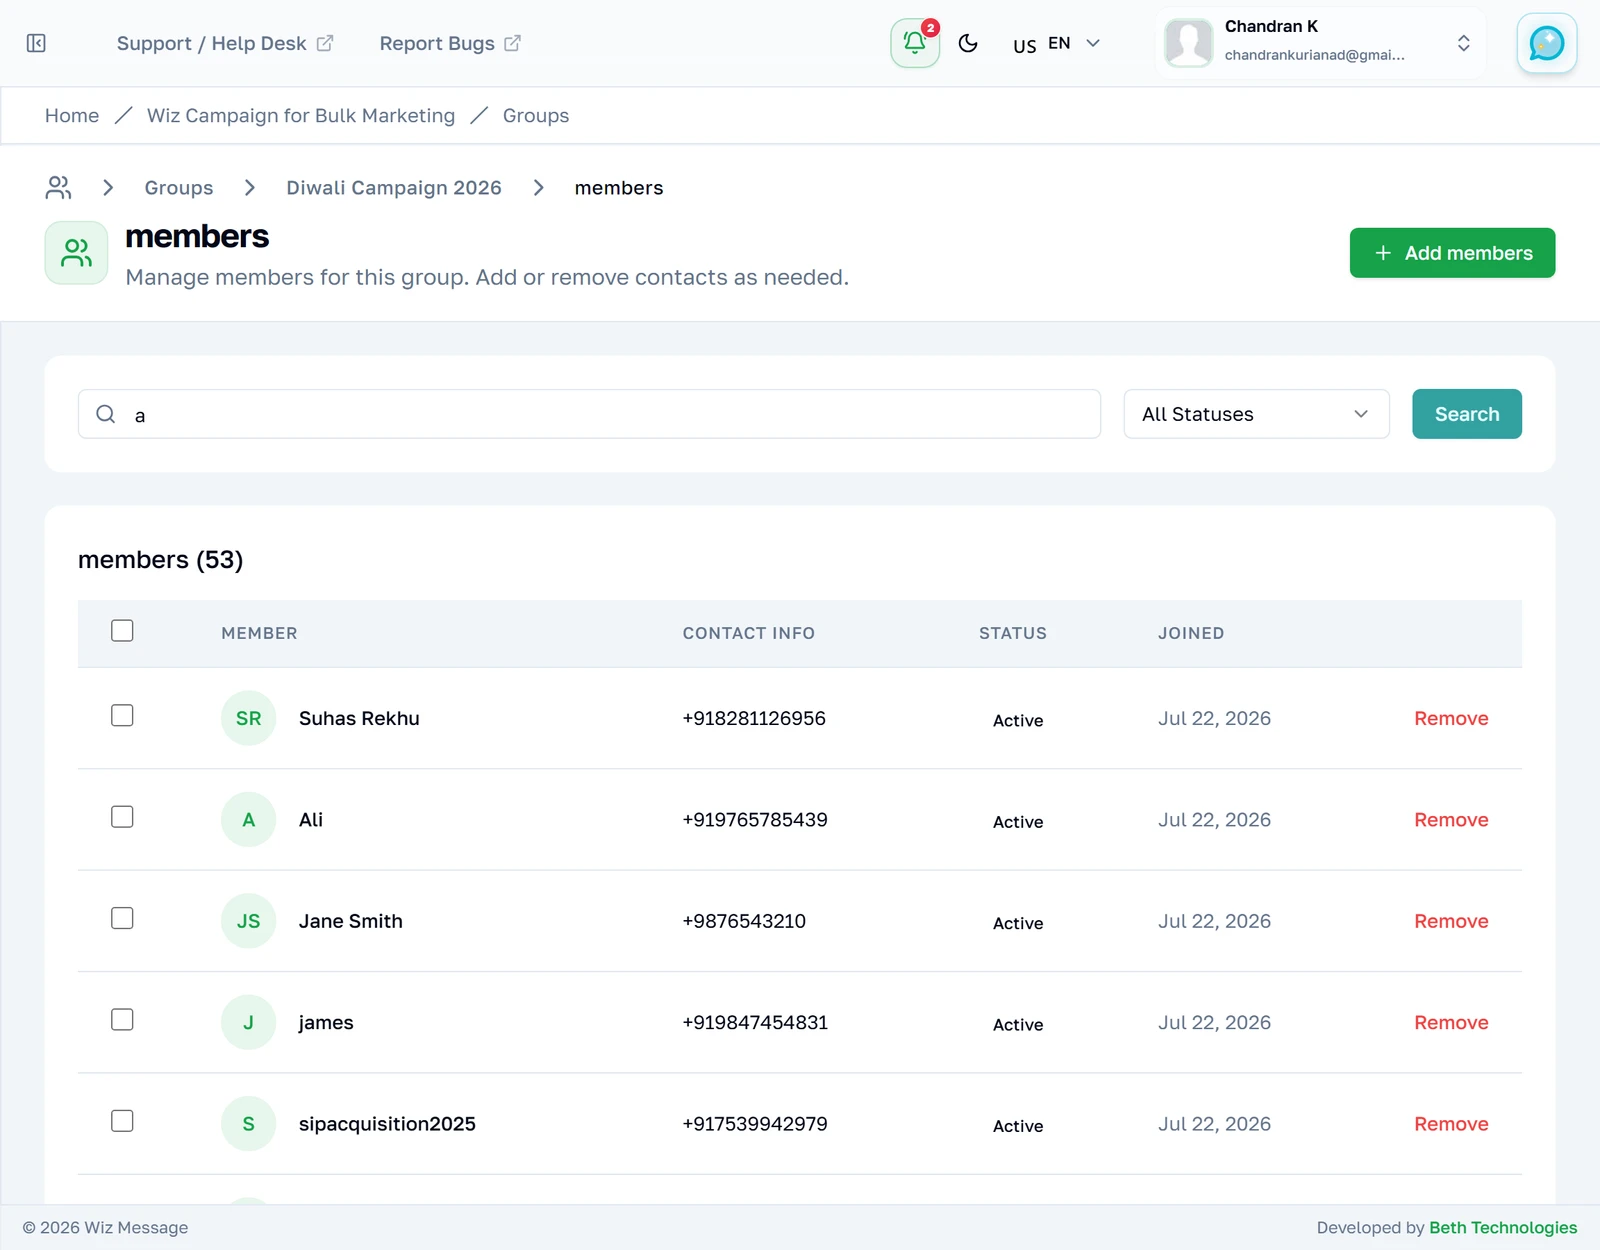
Search here matches name, phone and email — a wider net than the group search on the list page, which only reads names and descriptions. The status dropdown filters by the status of the contact.
Selecting several at once
The checkbox in the table header selects everything currently loaded — the fifty rows on screen, not all sixty-two in the group. Once anything is ticked a Remove Selected button appears beside the count. It removes them from the group only; the contacts stay in your contact book.
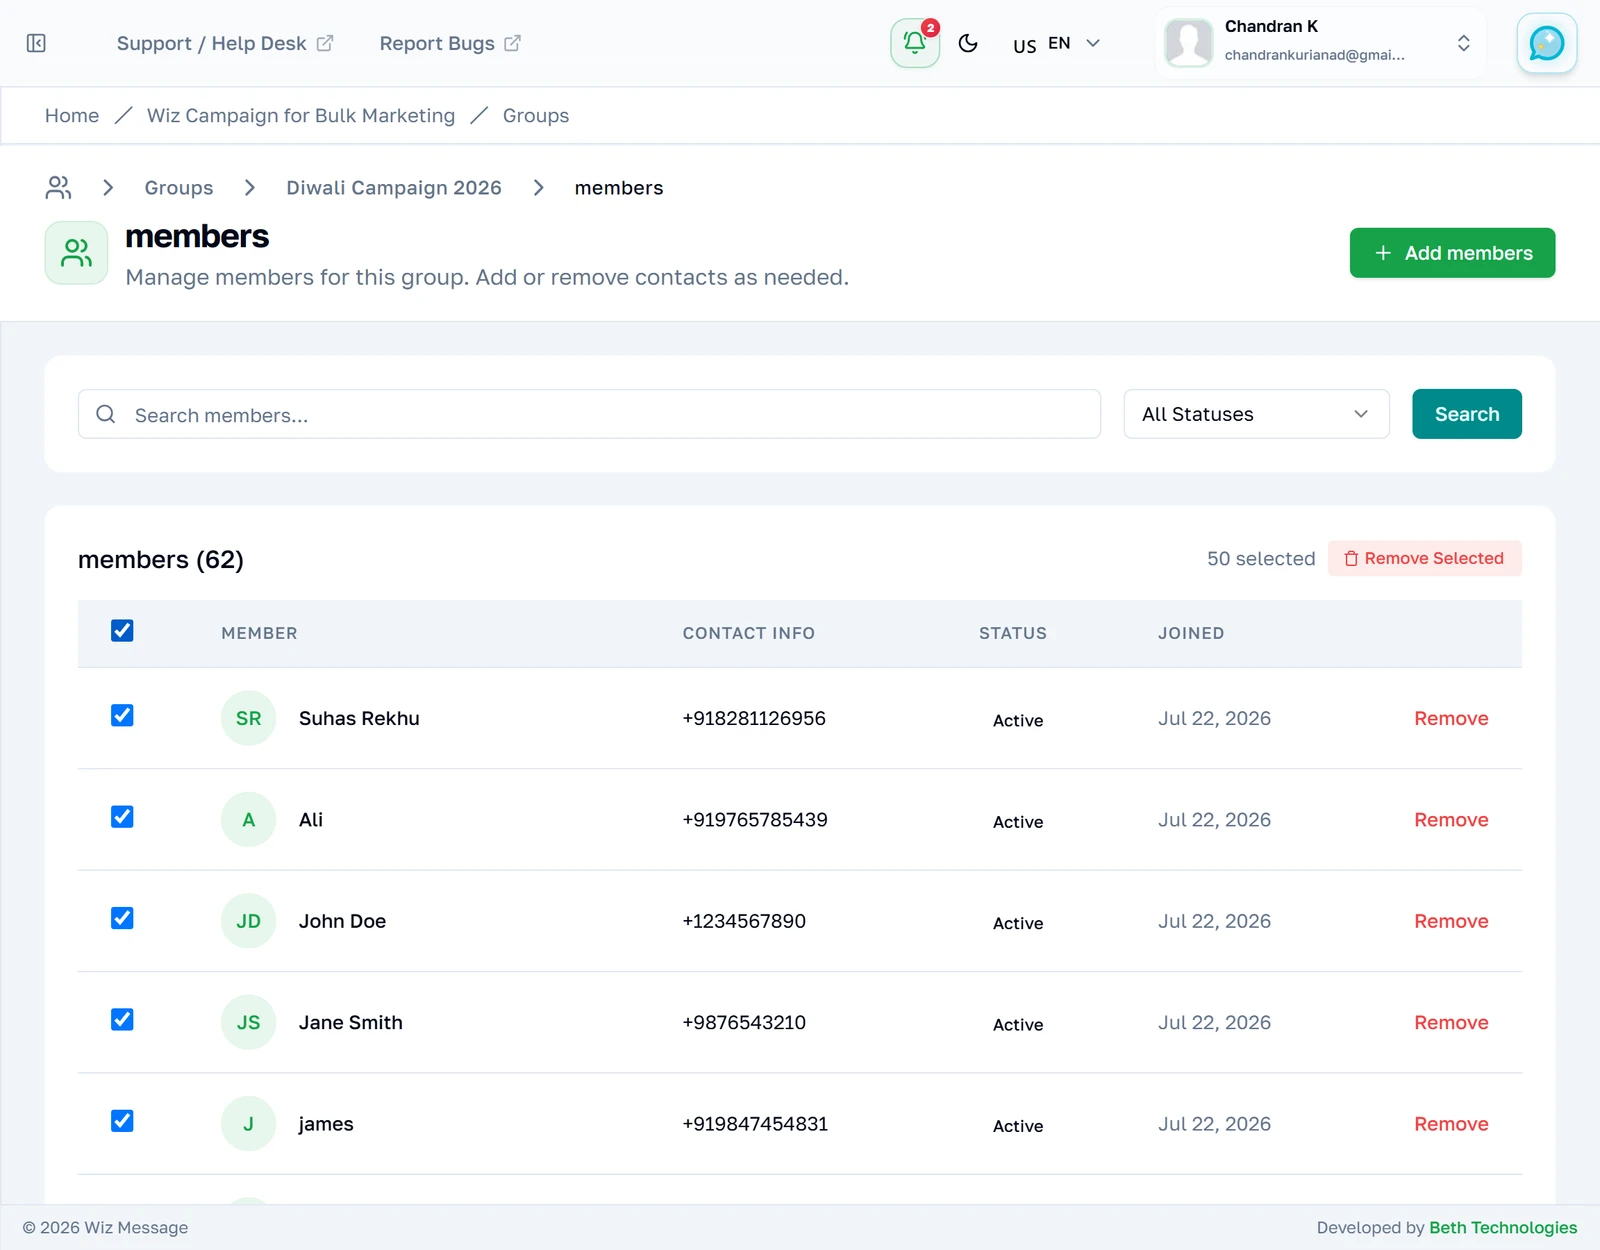
The rest of the members
The same pattern as the group list, counted in members. Note that a selection made before loading more does not extend to the rows that arrive.

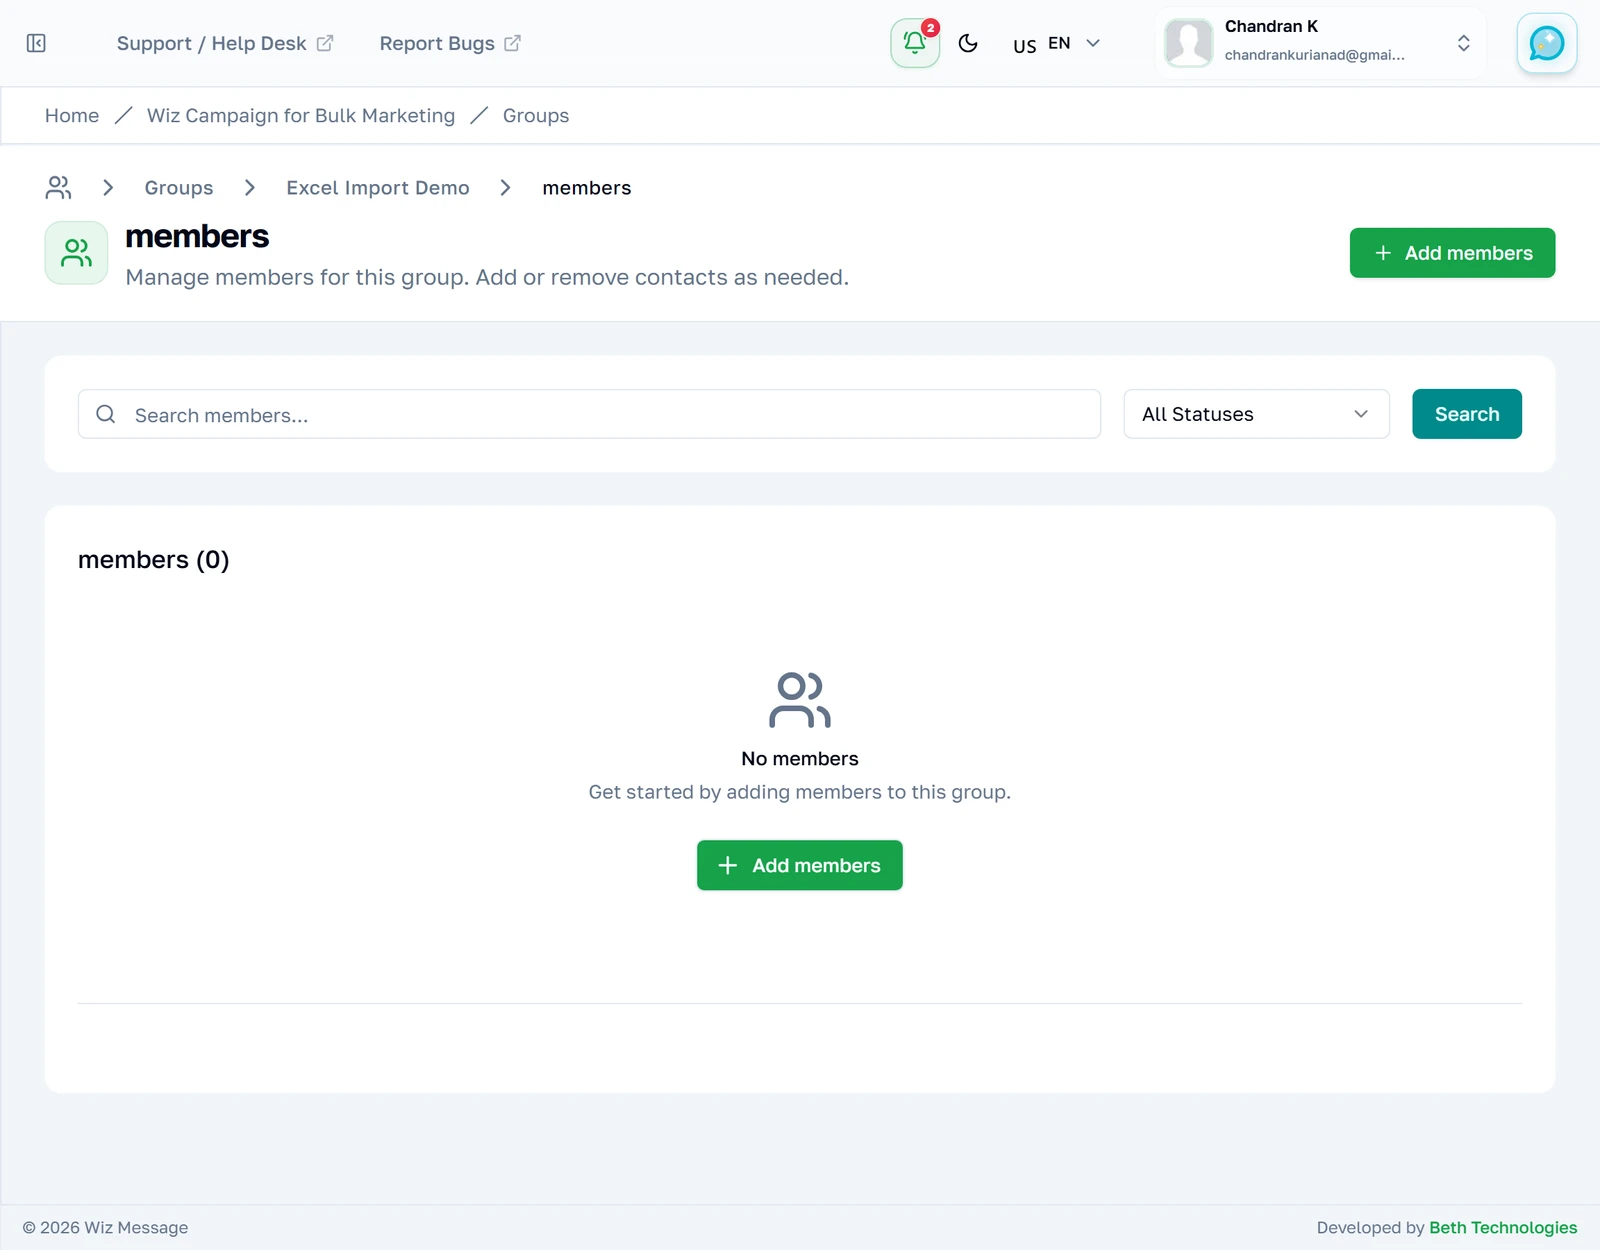
Before anyone has been added
The empty state of a group nobody has been added to yet. The button goes to the same Add Members screen as the one in the page header.
Adding contacts you already have
The Add Members screen
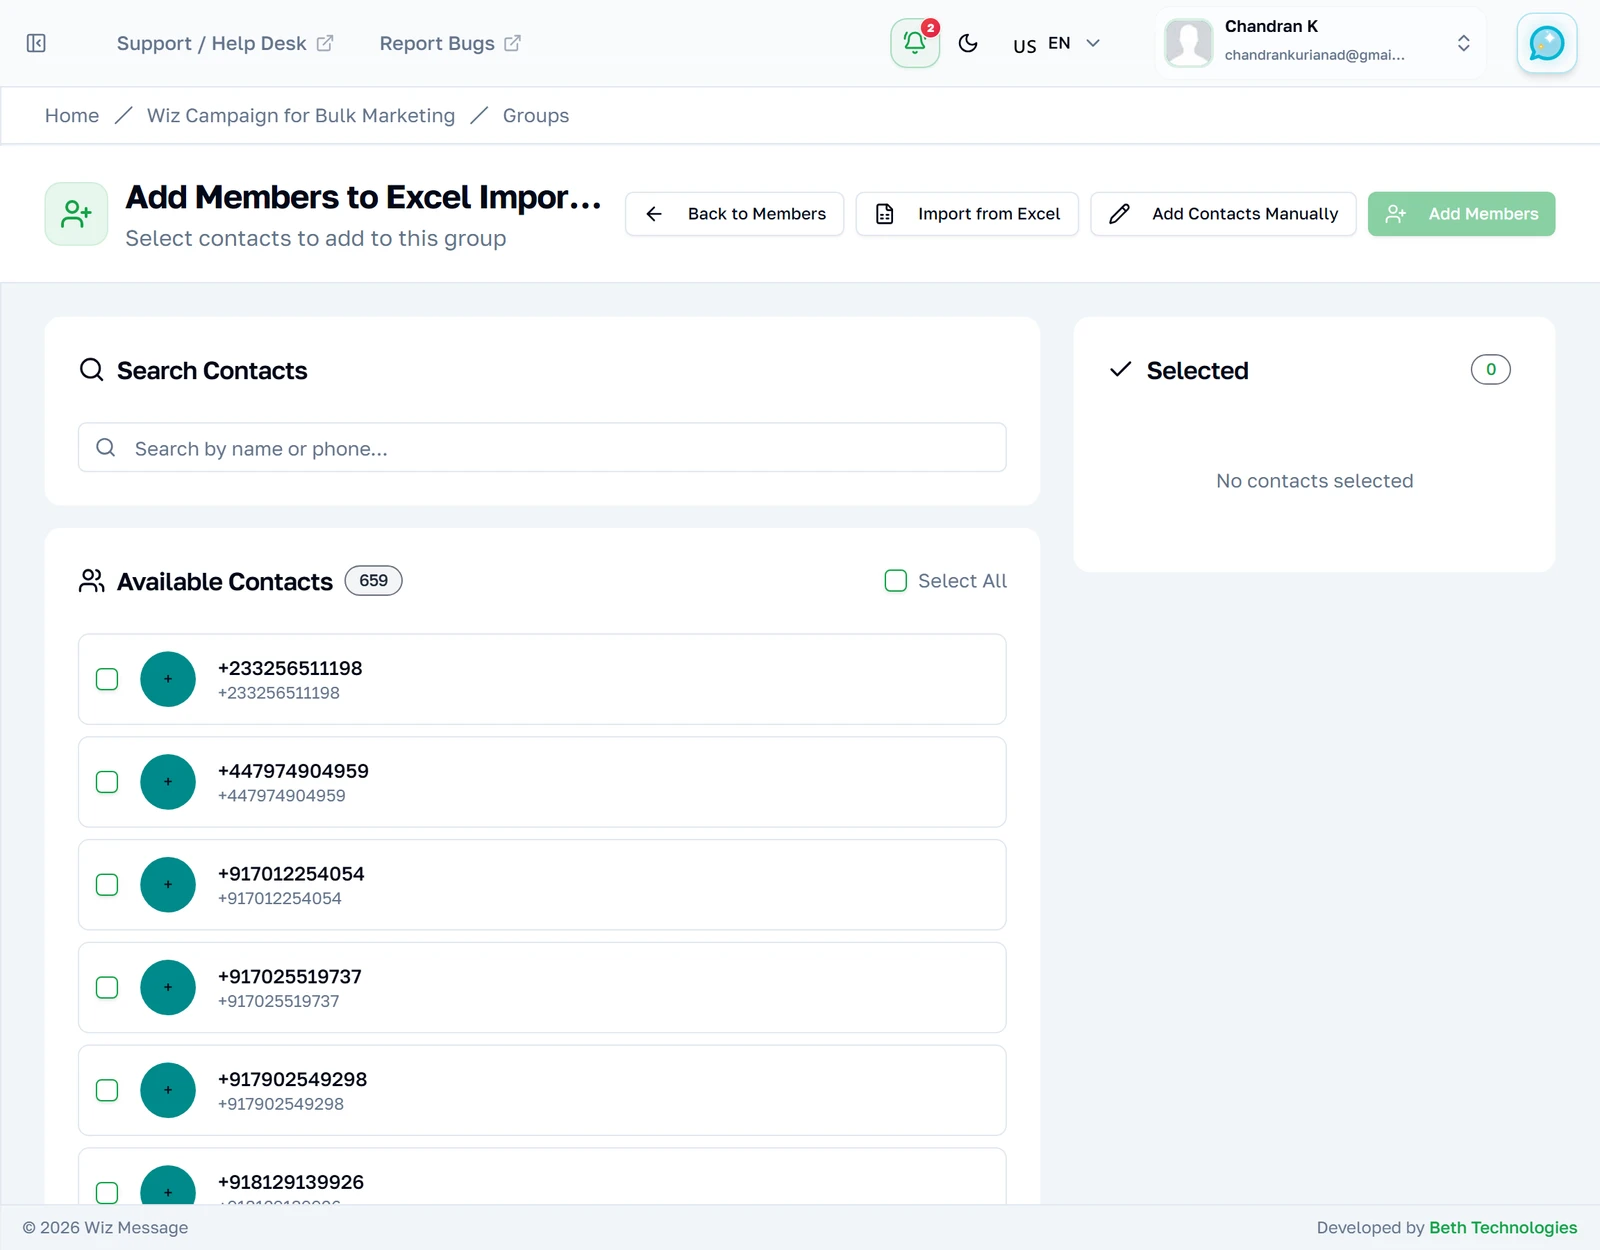
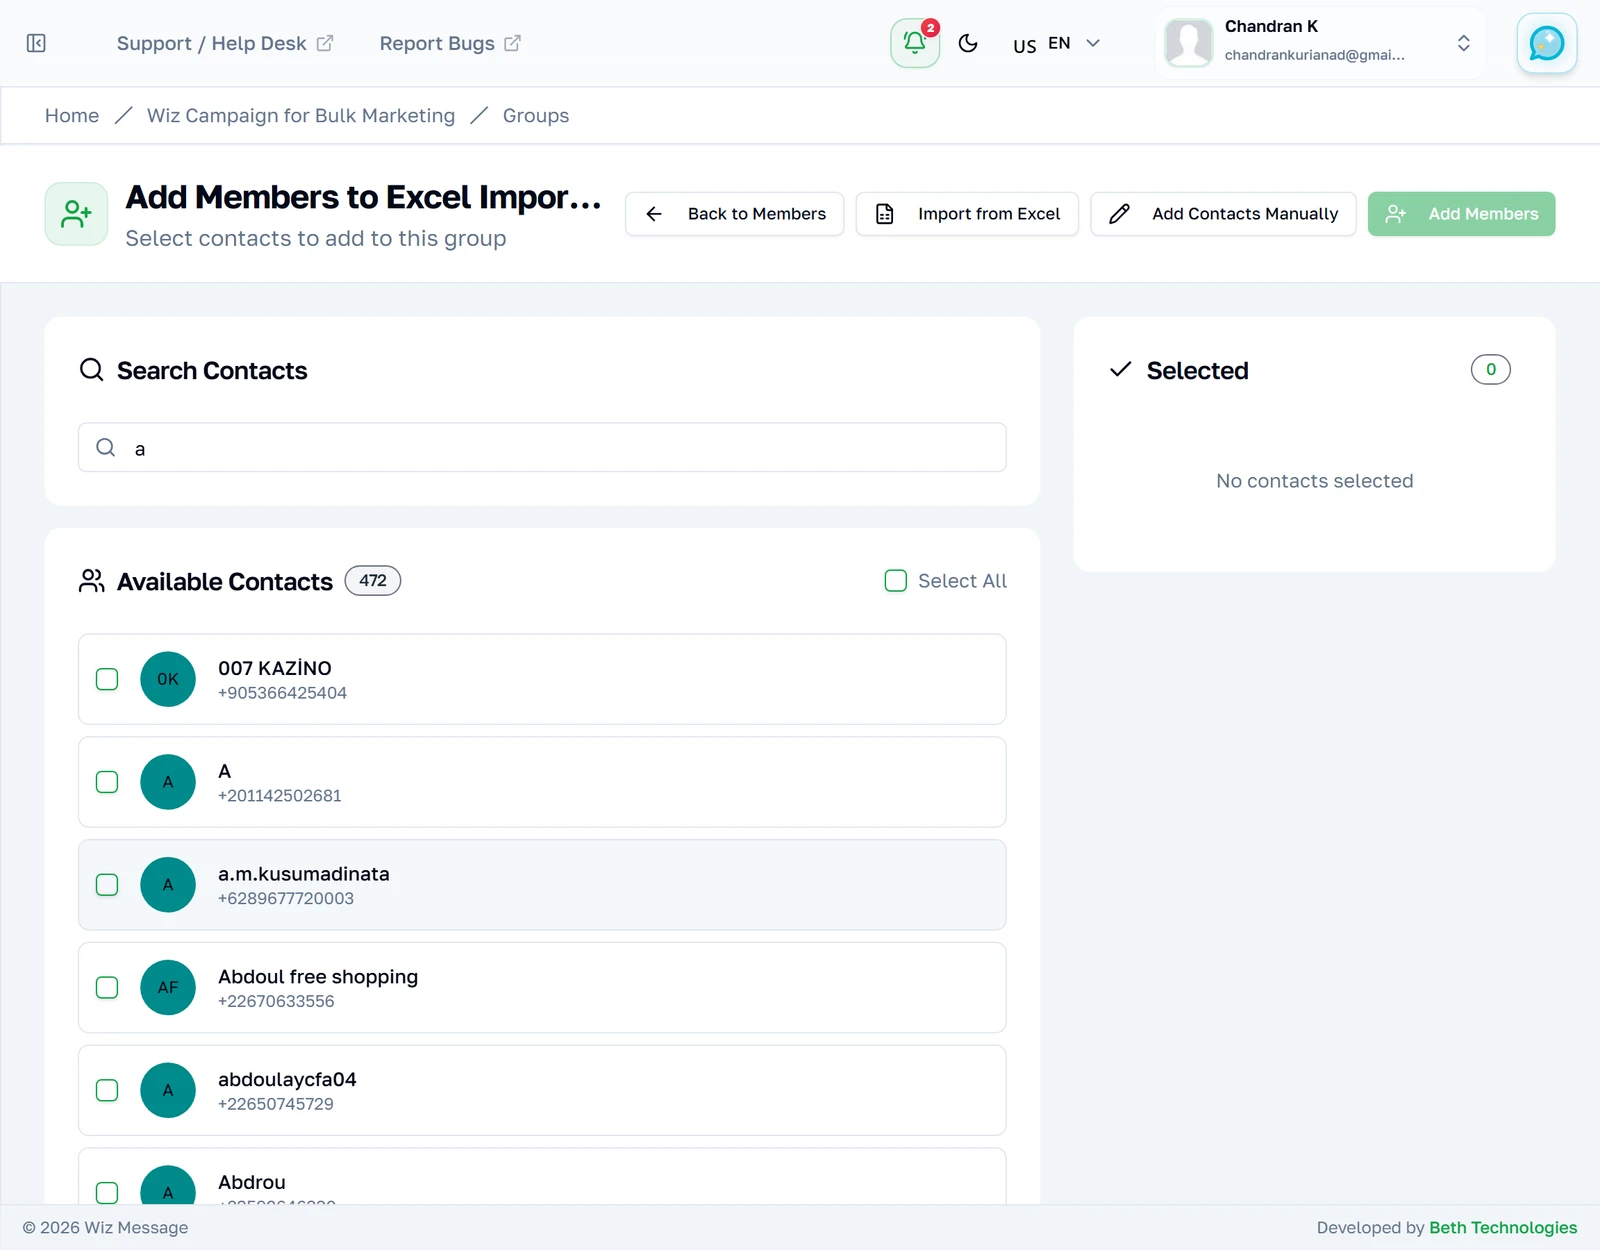
The left column lists every active contact in your account that is not already in this group, twenty-five at a time. Contacts marked inactive or blocked never appear here — if someone is missing, check their contact status before assuming the search is broken.
Building the selection
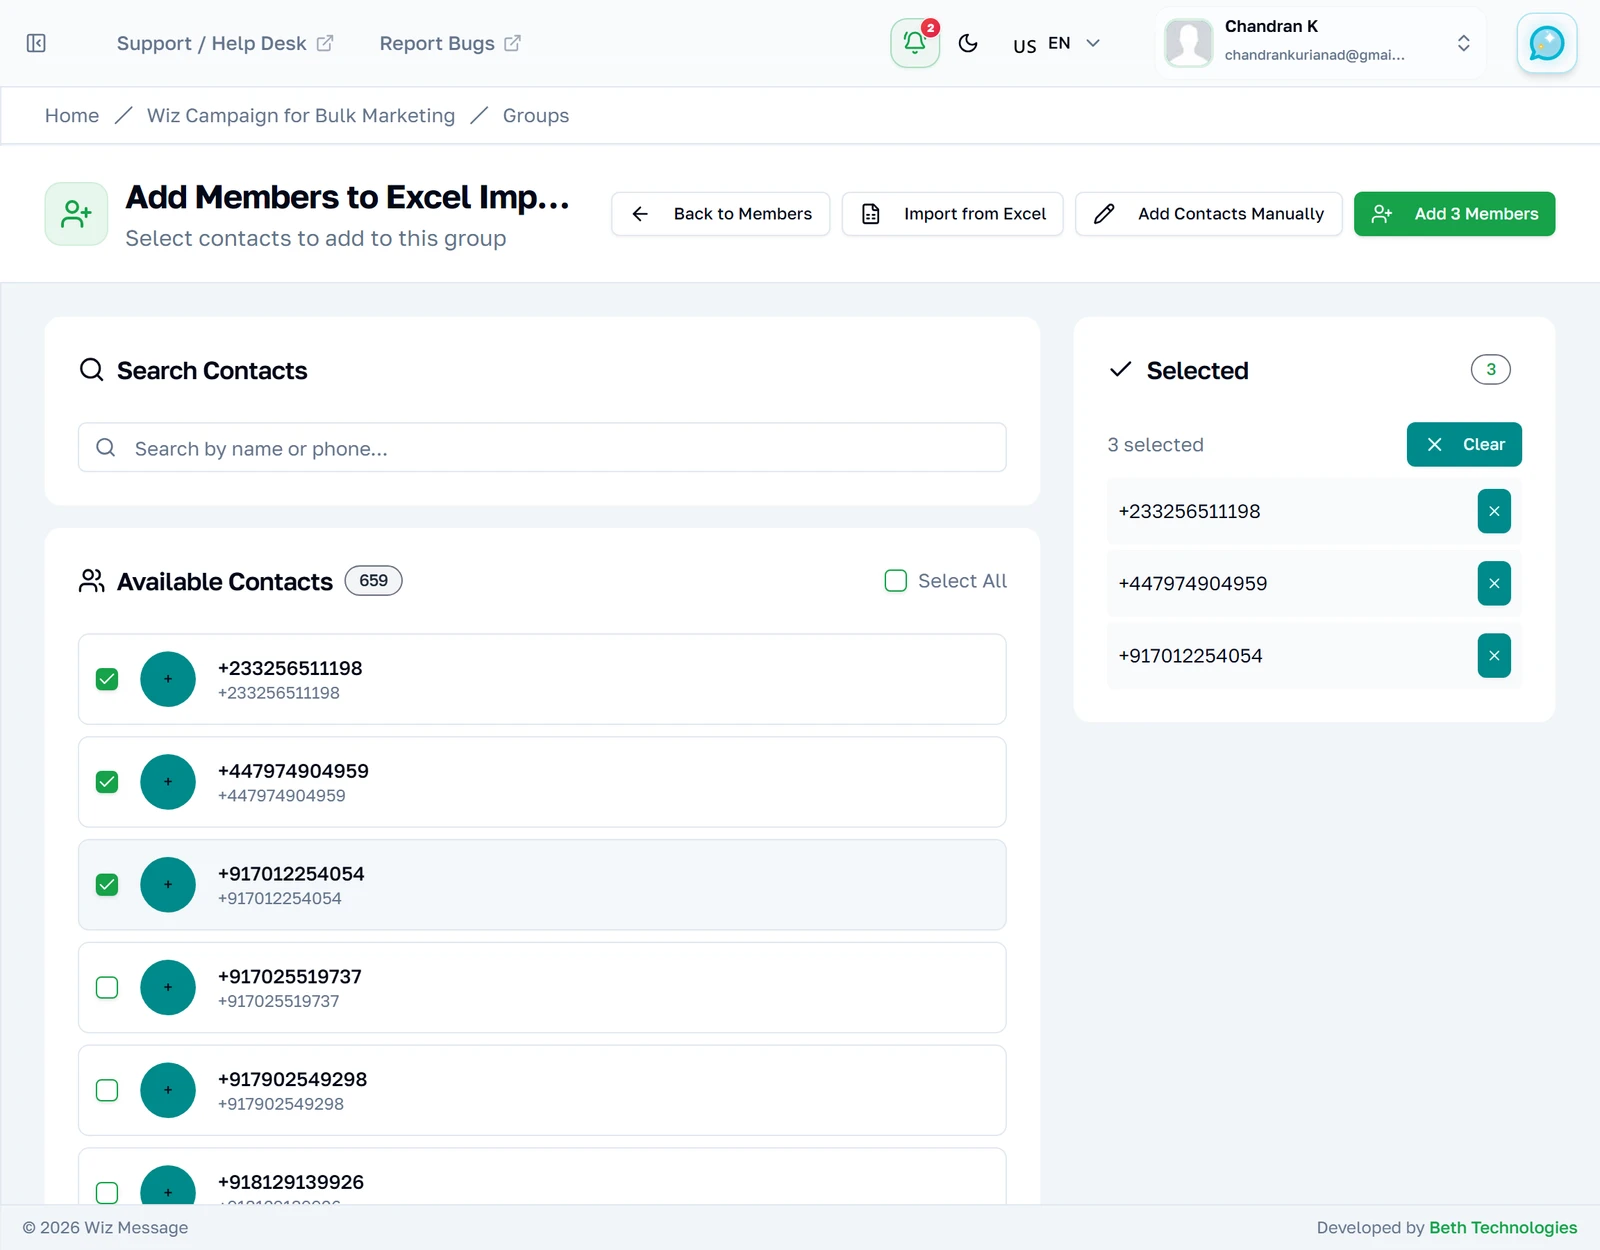
Ticking a contact moves it into the panel on the right, which is the authoritative list of what you are about to add. Remove one with the cross beside it, or empty the panel with Clear. The button in the header counts your selection and stays disabled until there is one.
Searching the available contacts
This box searches names and phone numbers, and filters as you type. It searches your whole contact book, not just the twenty-five rows currently on screen — so a contact on page four is one search away rather than four Load Mores away.
Importing from a spreadsheet
Step 1 — the file
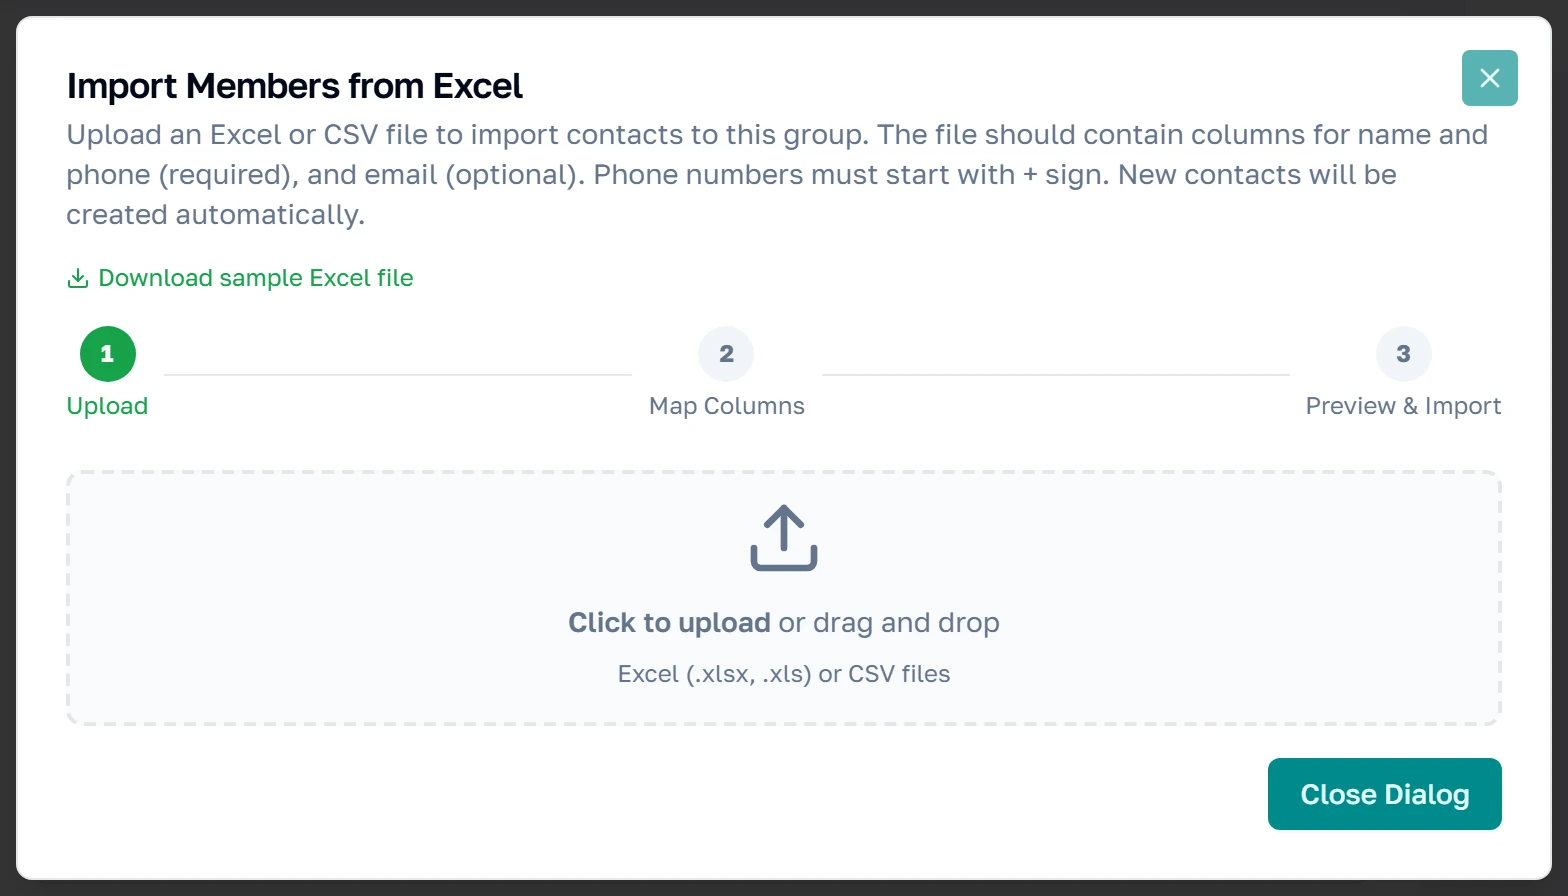
Import from Excel opens a three-step dialog. It accepts .xlsx, .xls and .csv, and the first row of your file must be the column headings. If you have nothing to start from, the link under the heading downloads a template with the right columns already in it.
Step 2 — matching your columns to ours
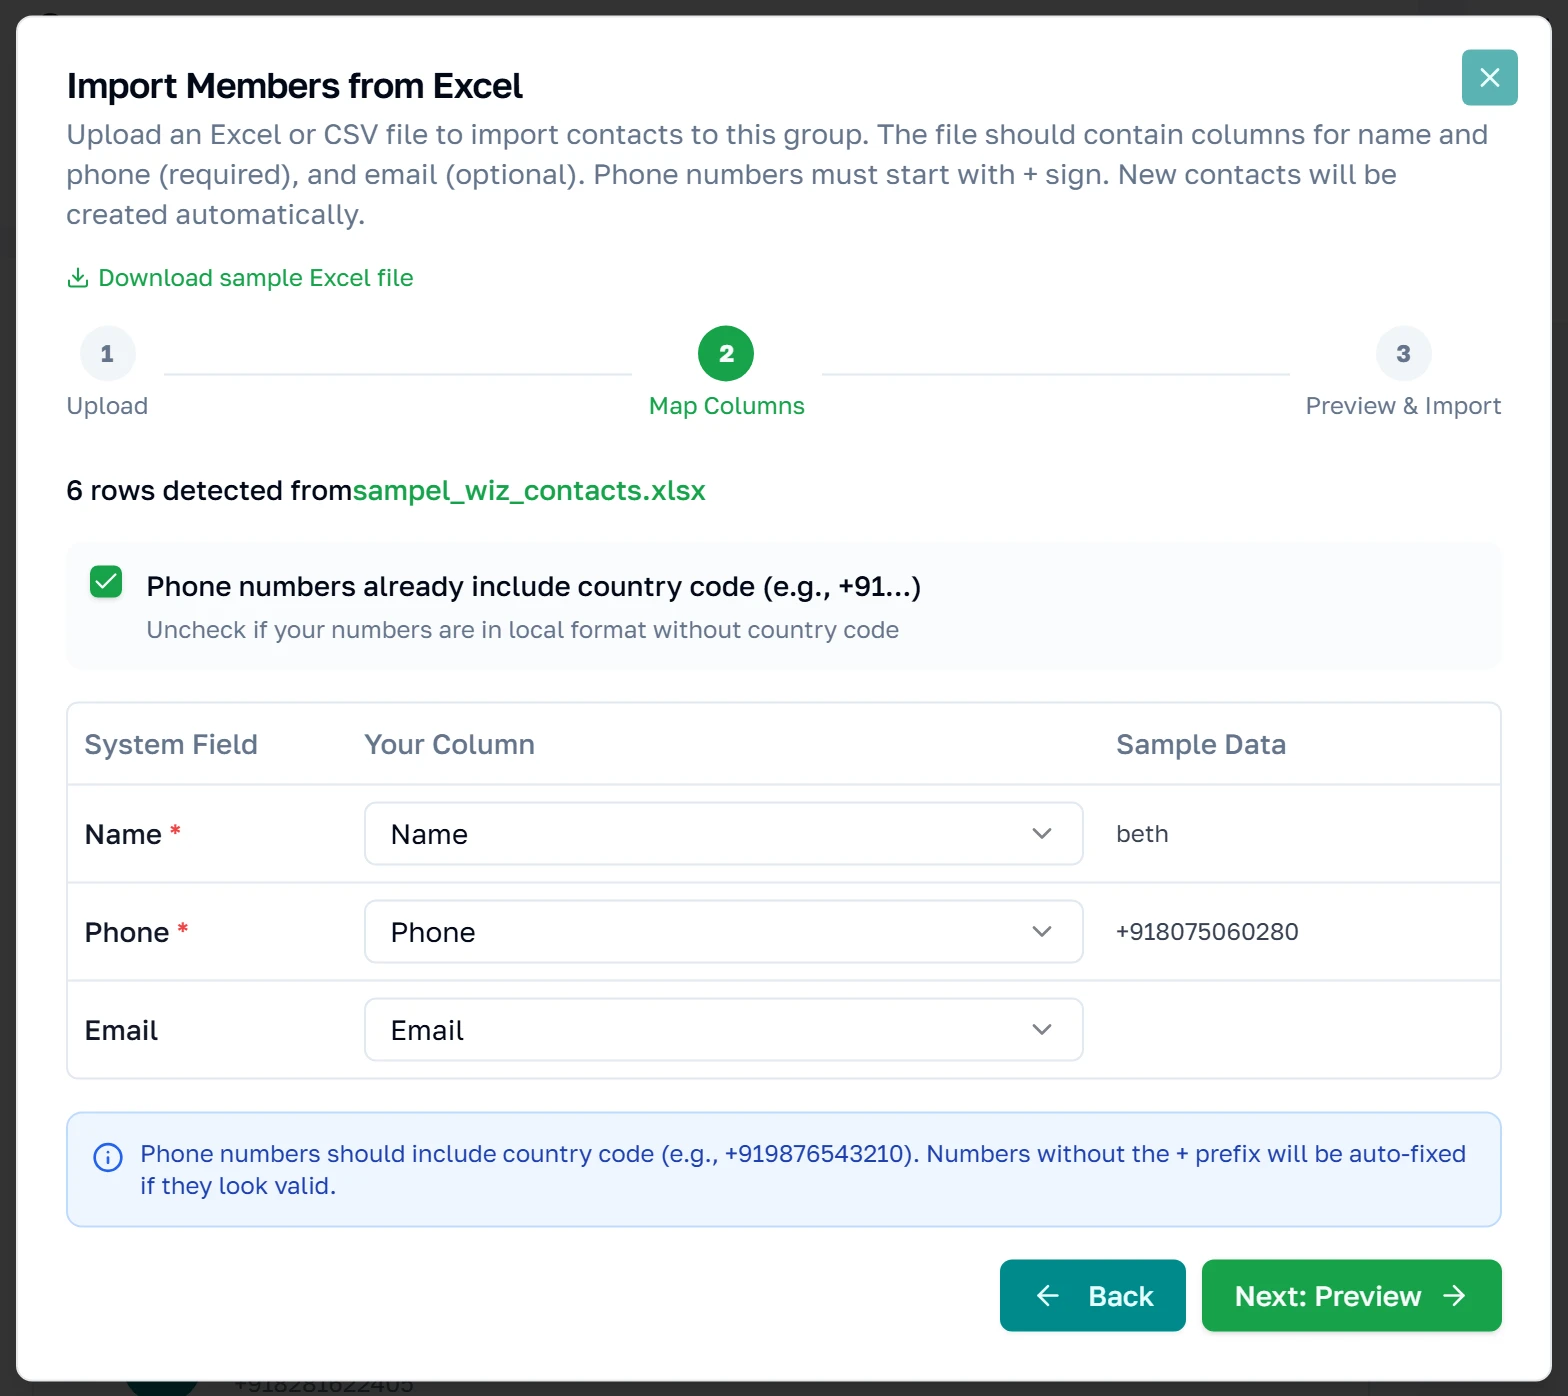
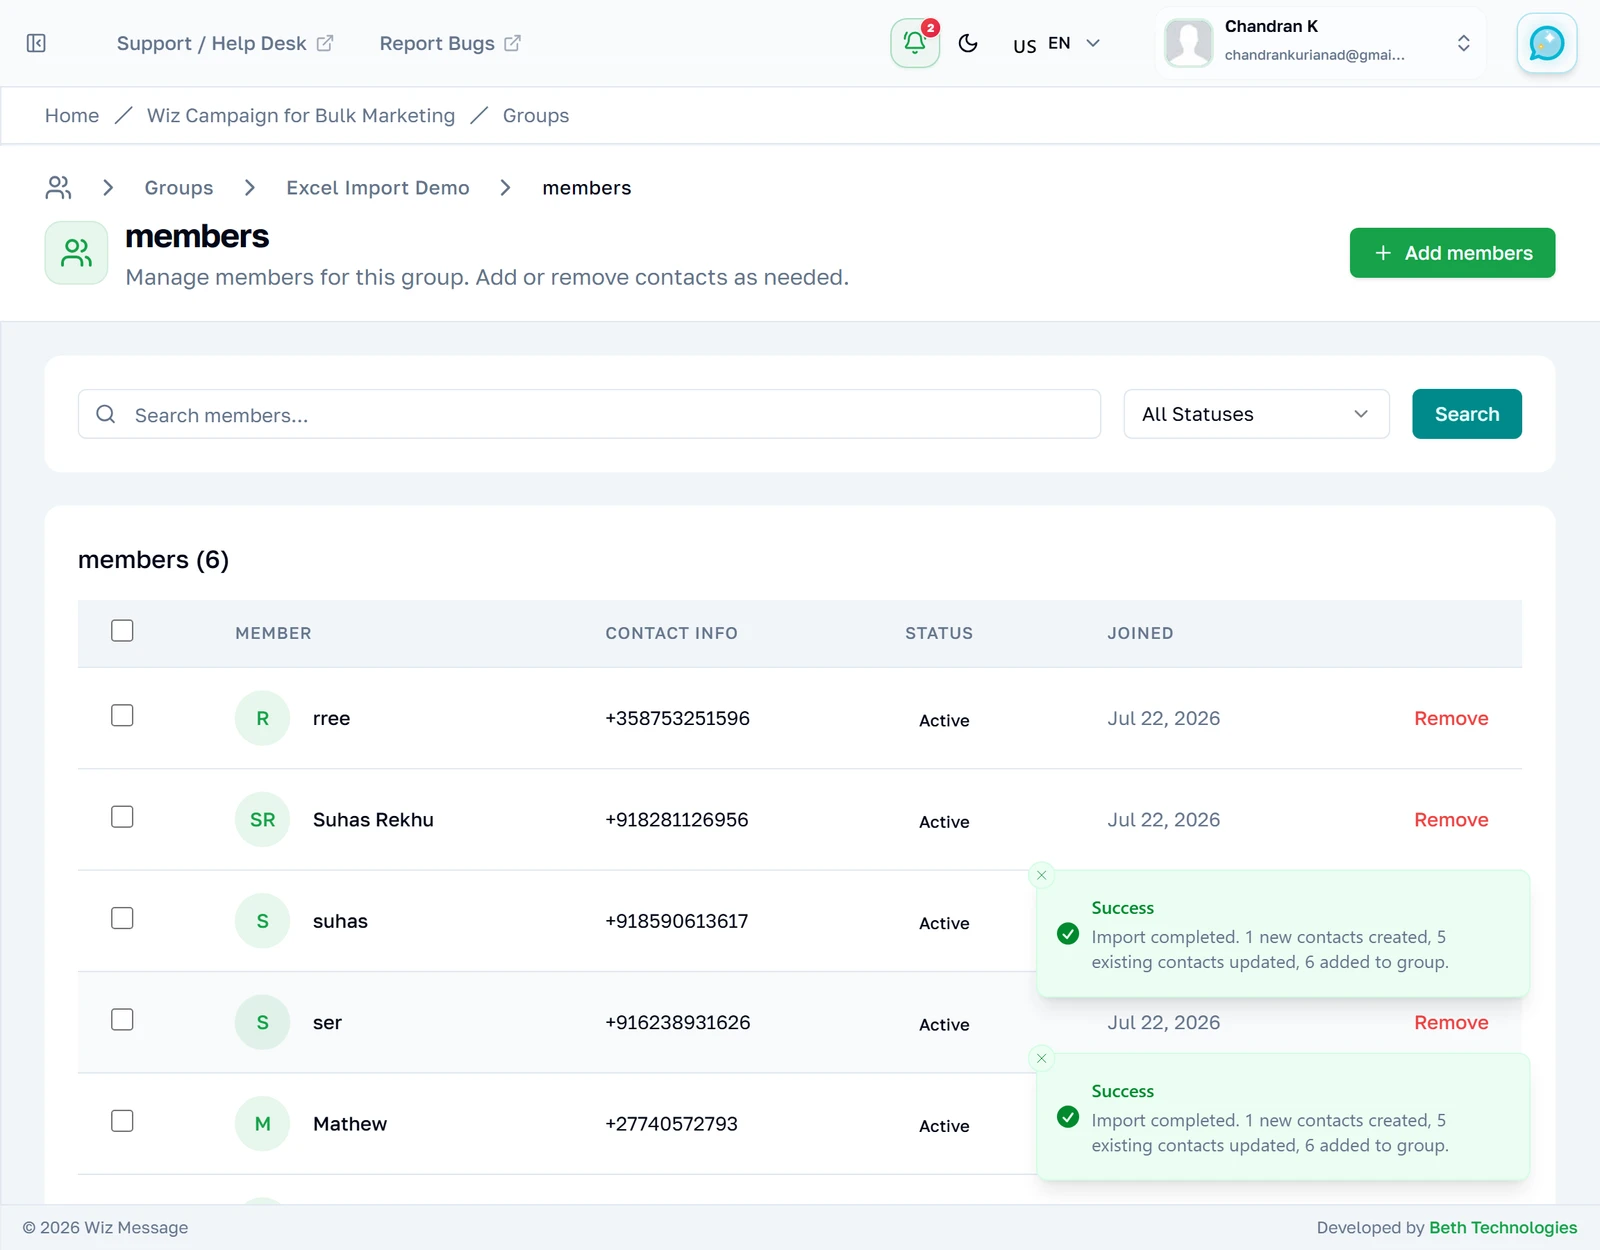
Your file is read in the browser; nothing is uploaded yet. The three rows are what the product needs — Name and Phone are required, Email is optional — and each one is matched to a column of yours automatically where the heading is recognisable. Anything it cannot guess is left as Not mapped, and Next stays disabled until Name and Phone both point somewhere. The Sample Data column shows the first row of your file so you can see you picked the right column.
Step 3 — check before you commit
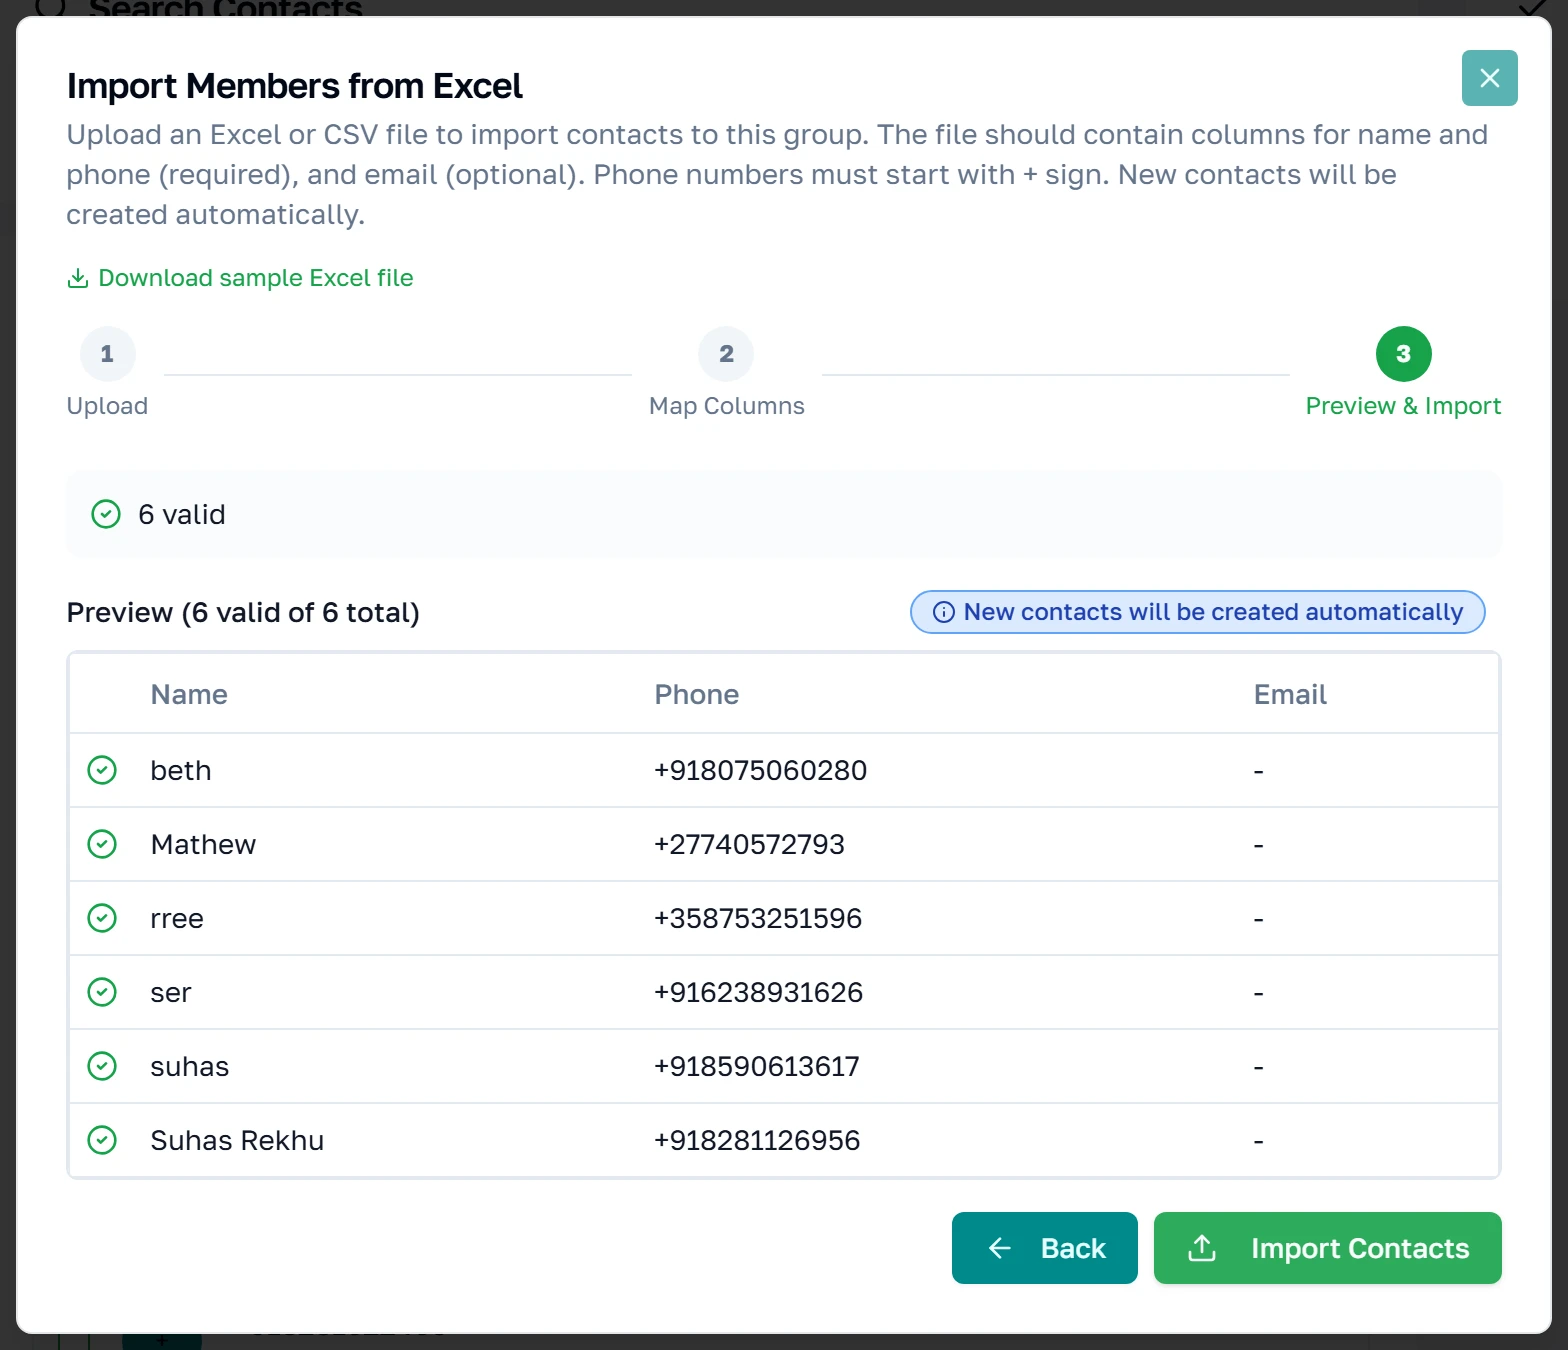
Phone numbers are normalised here, before anything is sent to the server. The bar above the table reports what happened: this file needed no work, so it says only 6 valid — an invalid count and an auto-fixed count appear beside it when there is something to report, and a row whose number was rewritten shows the original underneath as was. Rows that could not be fixed are still listed; the tick or cross in the first column is what separates them. Only the first ten rows are shown however large the file is, and Import Contacts is the point of no return.
Where you end up
Pressing Import Contacts does the work and drops you on the member list of the group, with the imported people in it. There is no summary screen. The dialog contains one — a four-counter panel reporting how many were added, how many already existed and how many failed — but a successful import navigates away before it can be shown. The counts it would have given you are described in the reference below instead.
If your numbers have no country code
Telling the importer where the numbers are from
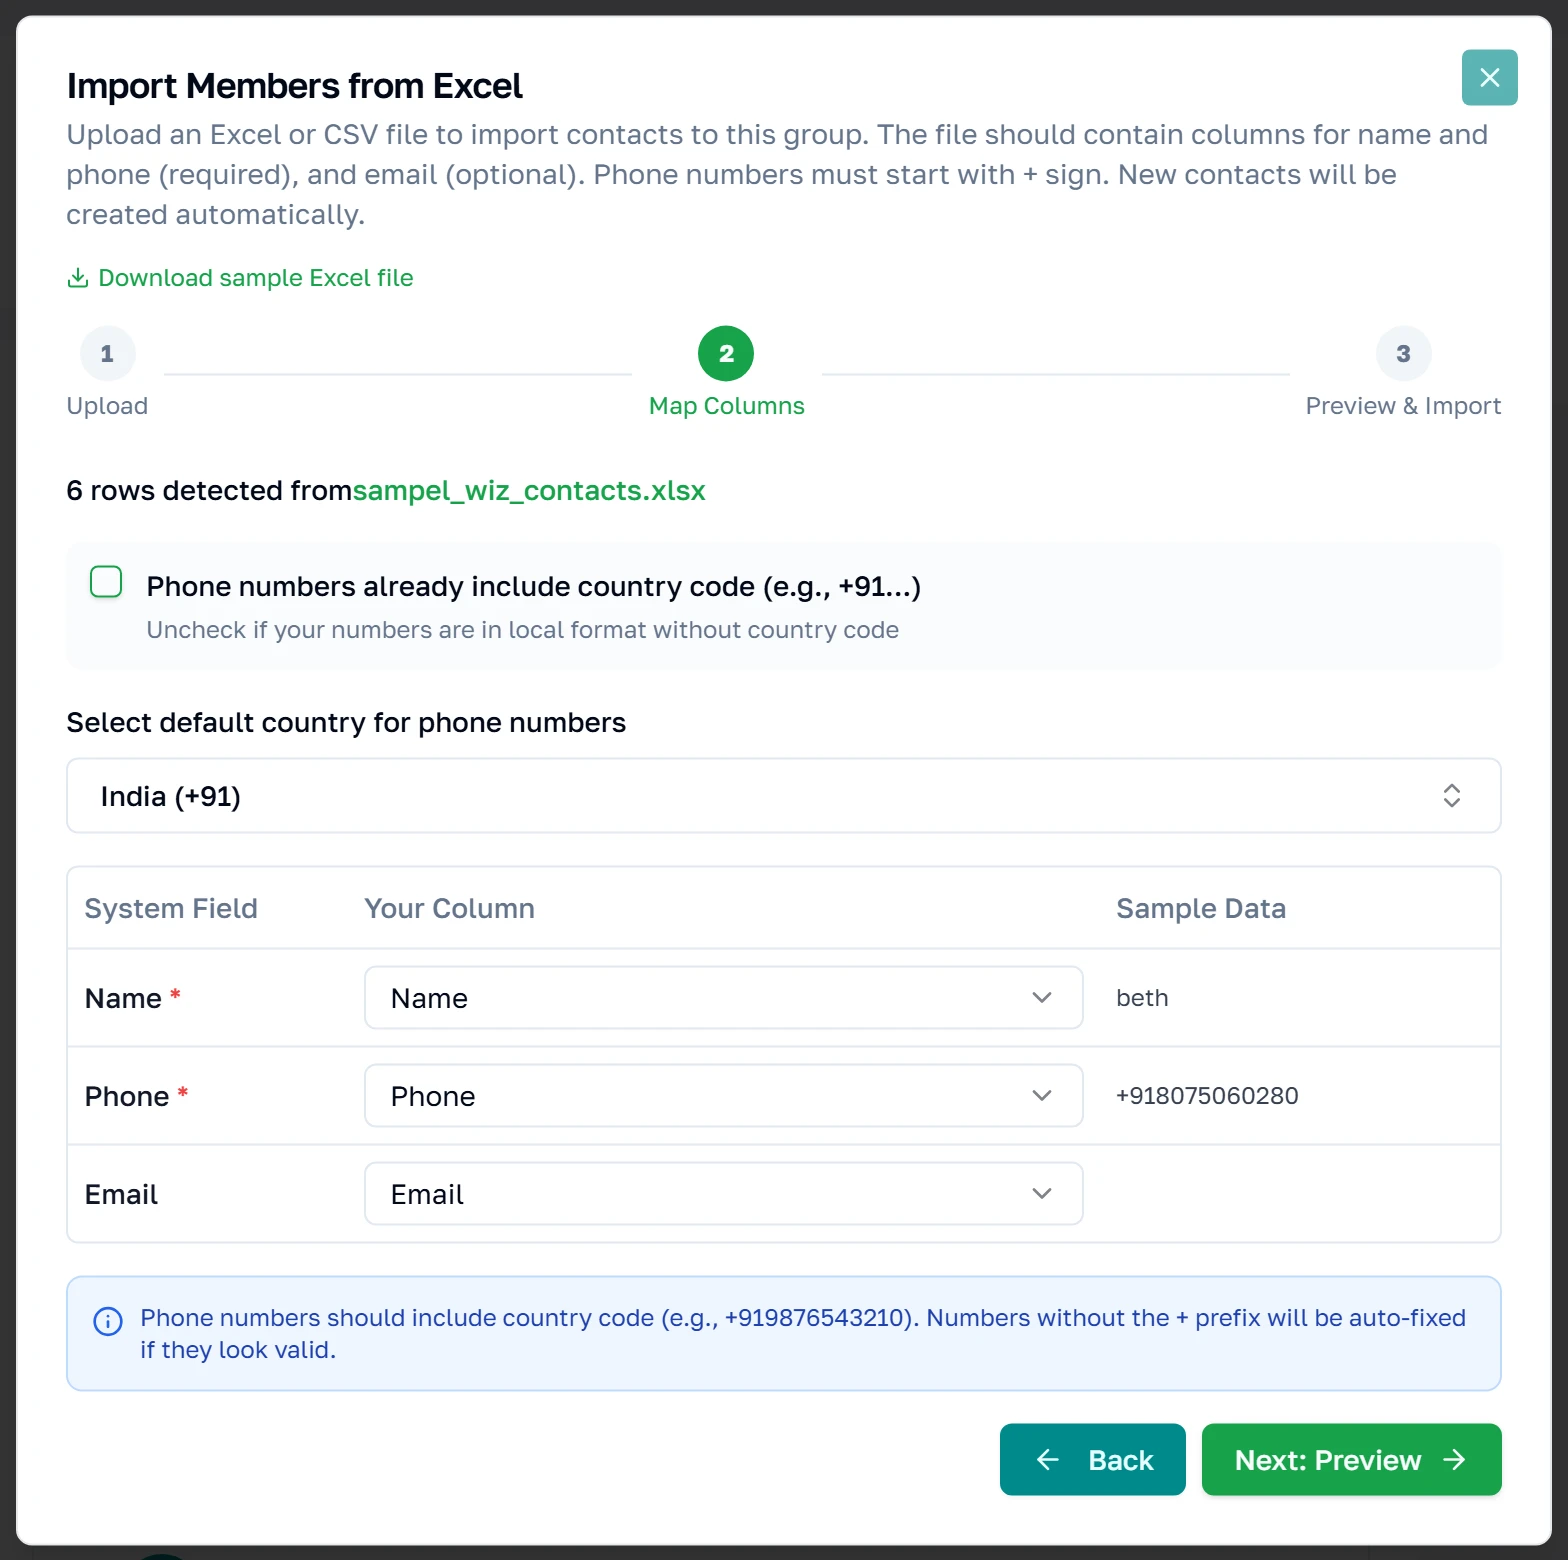
The tick box on the mapping step assumes your numbers already start with a country code. Untick it — because your export only has local numbers — and a country picker appears. Every number in the file is then treated as belonging to that one country, so a file mixing countries needs splitting first, or fixing in the spreadsheet.
Choosing the country
A searchable list, defaulting to India. This choice only affects numbers that need one — a row that already carries a country code is left alone.
Adding contacts by hand
When it is only two or three people
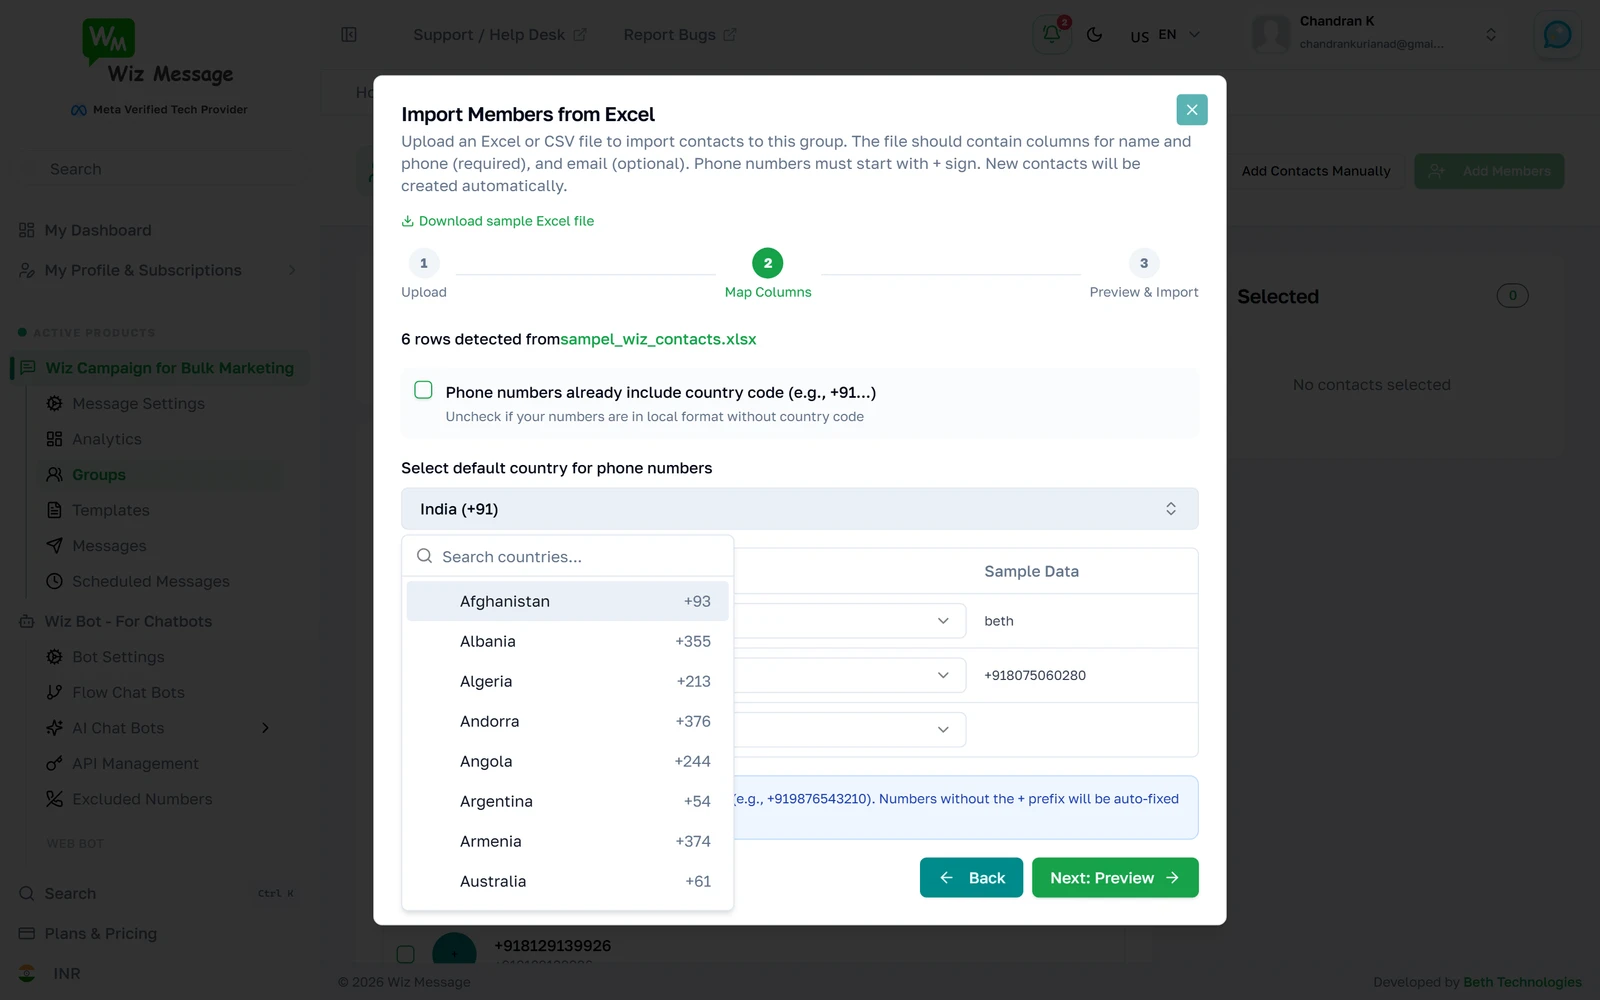
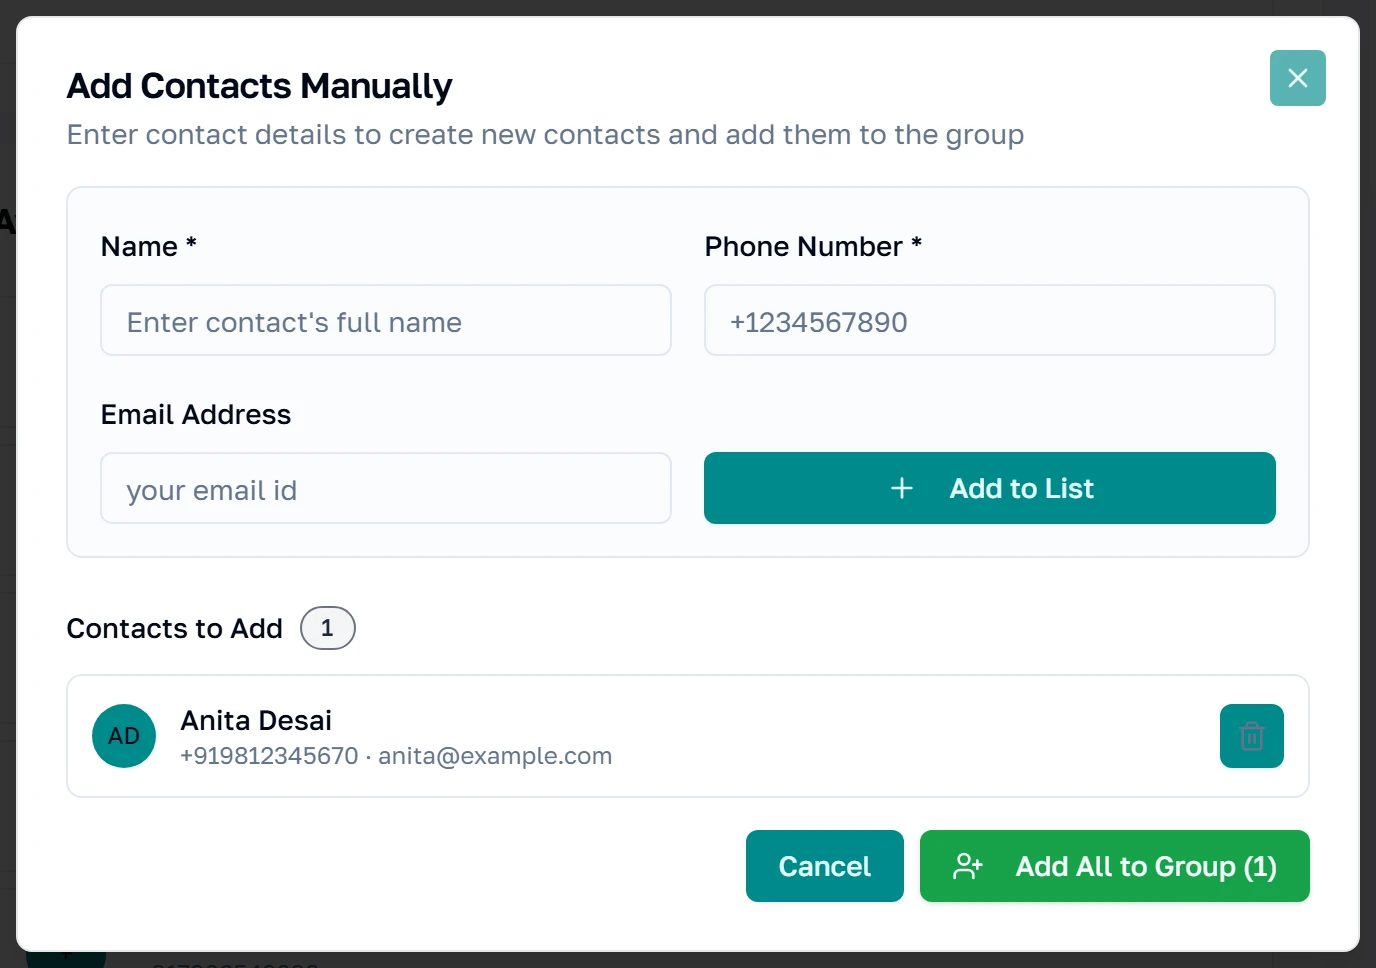
Add Contacts Manually builds a small list in the dialog before writing anything. Name and phone are required, and the phone must start with a plus and its country code — this form does not guess, unlike the spreadsheet importer.
One at a time, then all at once
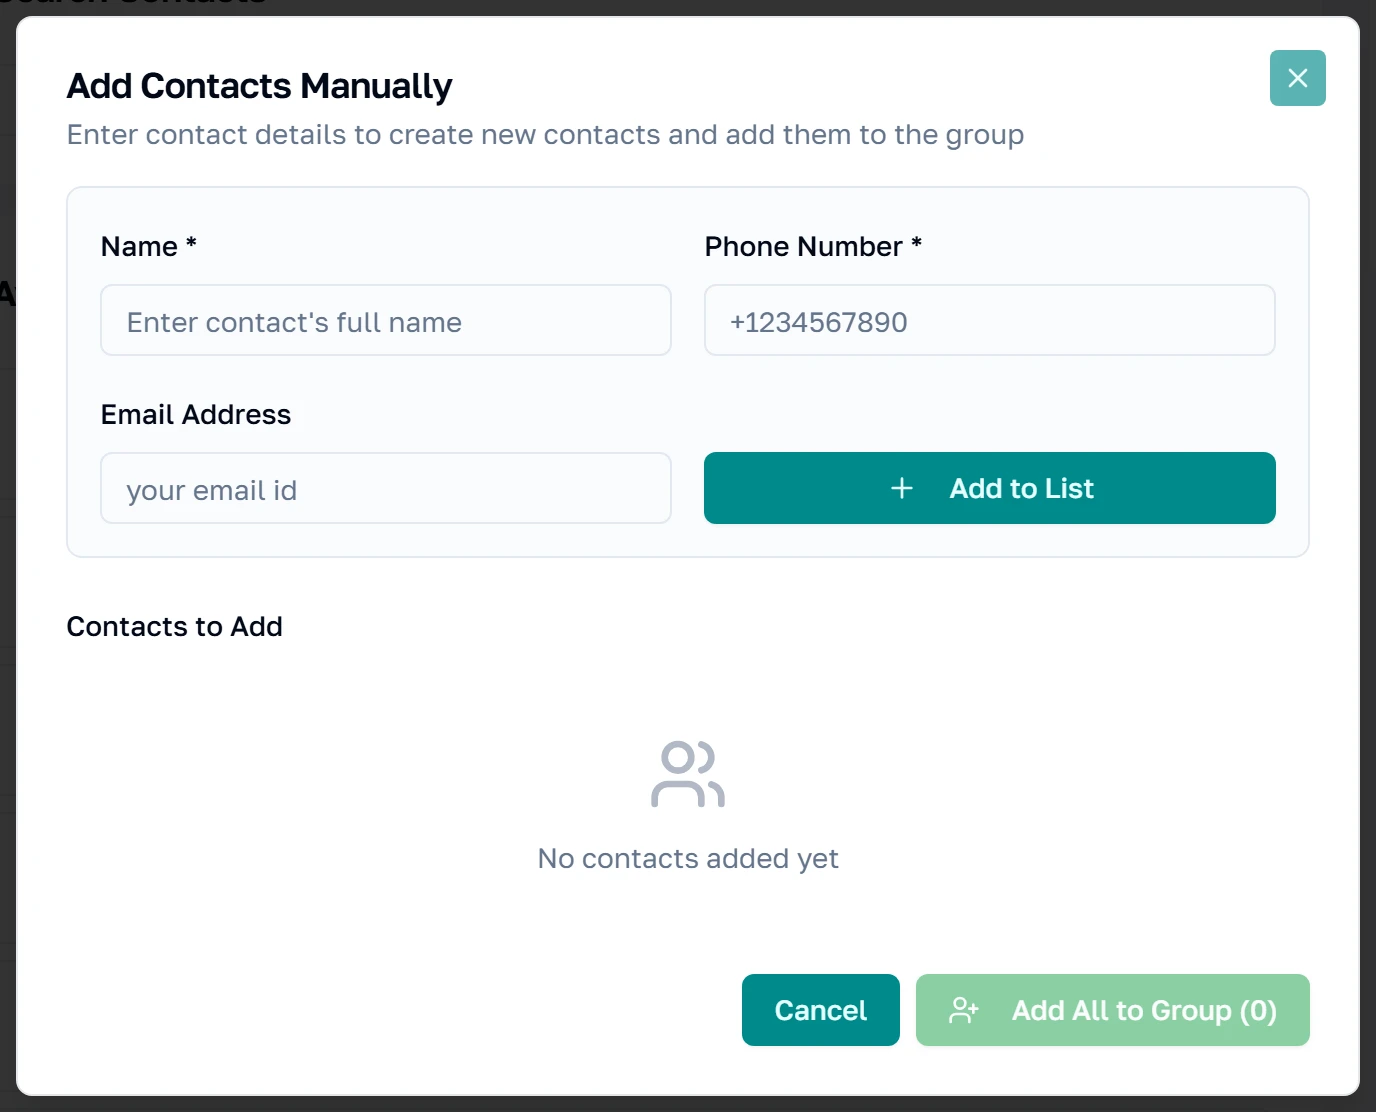
Add to List queues the contact and clears the form for the next one; nothing has been saved yet. The badge counts what is queued. Add All to Group is what writes them, and it goes through exactly the same path as the spreadsheet import — an existing number updates that contact instead of creating a second one.
Removing someone from a group
The imported members
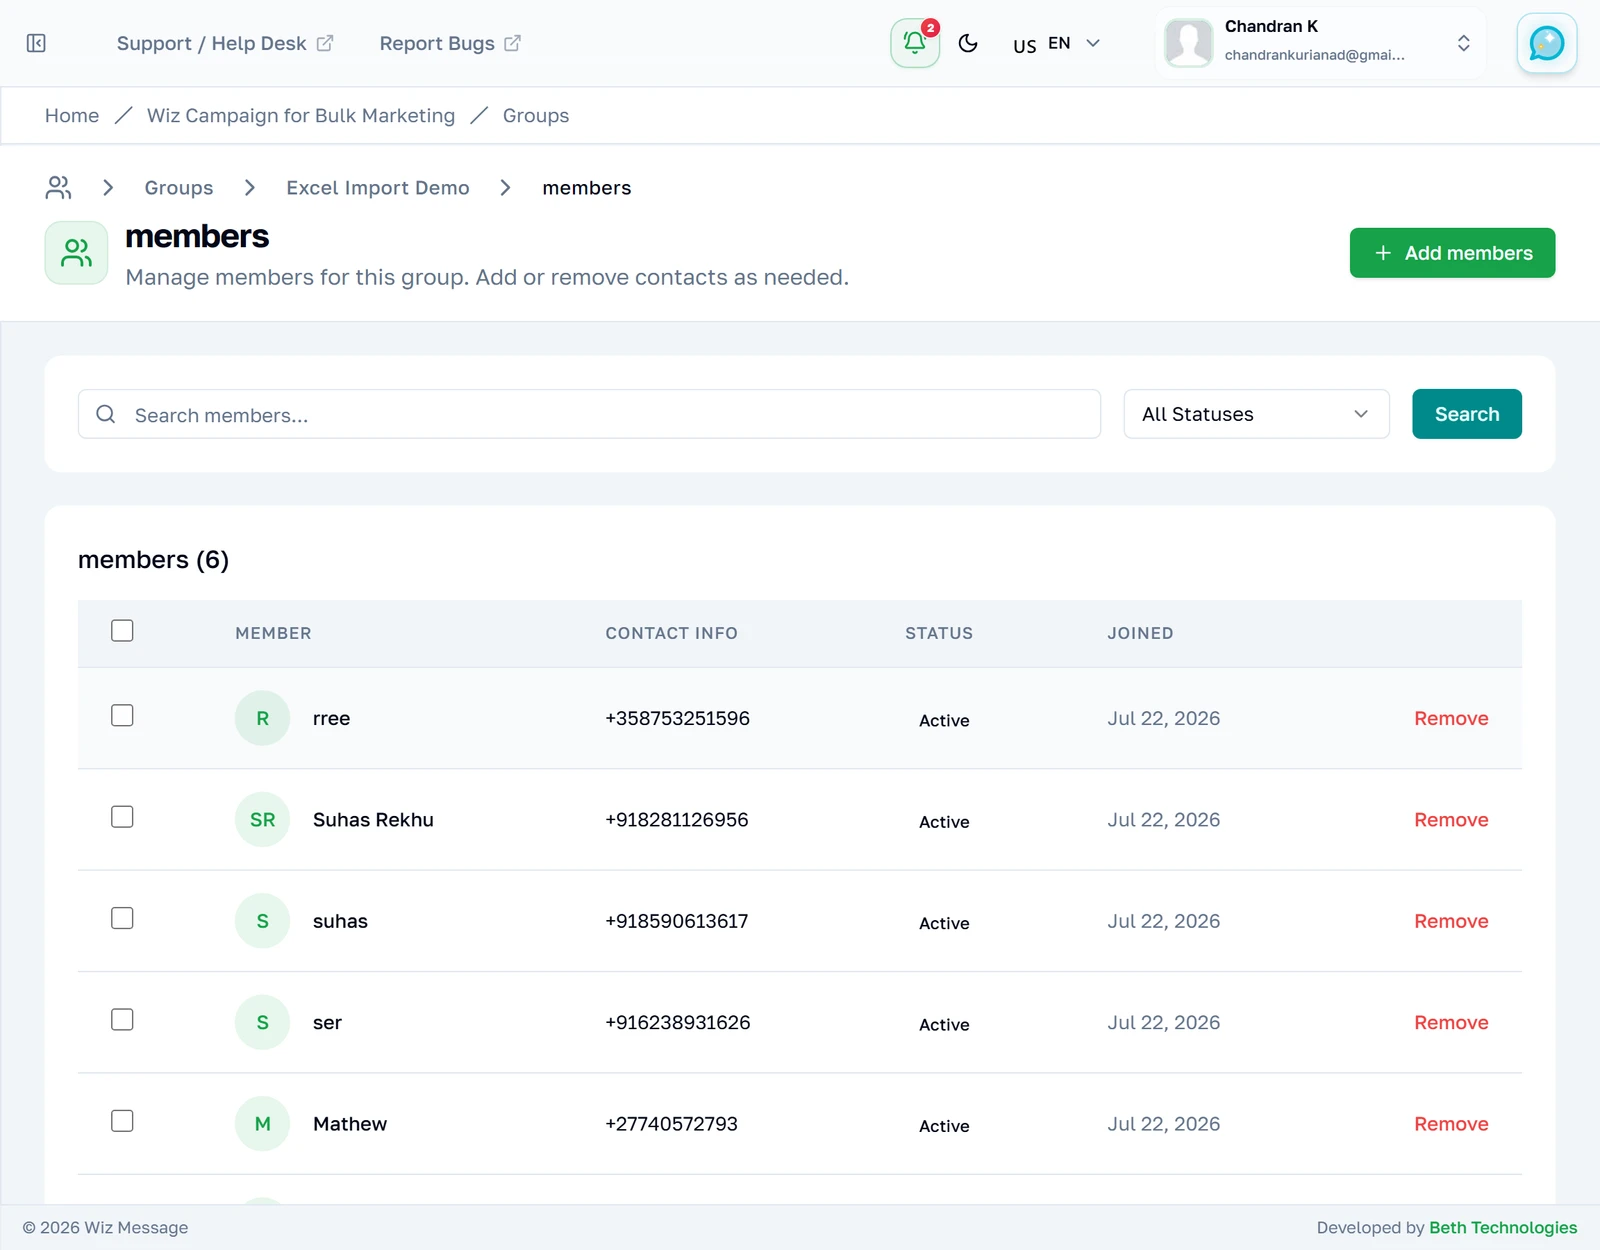
Back on the member list, the six rows from the spreadsheet are now in the group. Two of them existed in the contact book already and were reused; the rest were created by the import.
Remove takes them out of the group, not out of your account
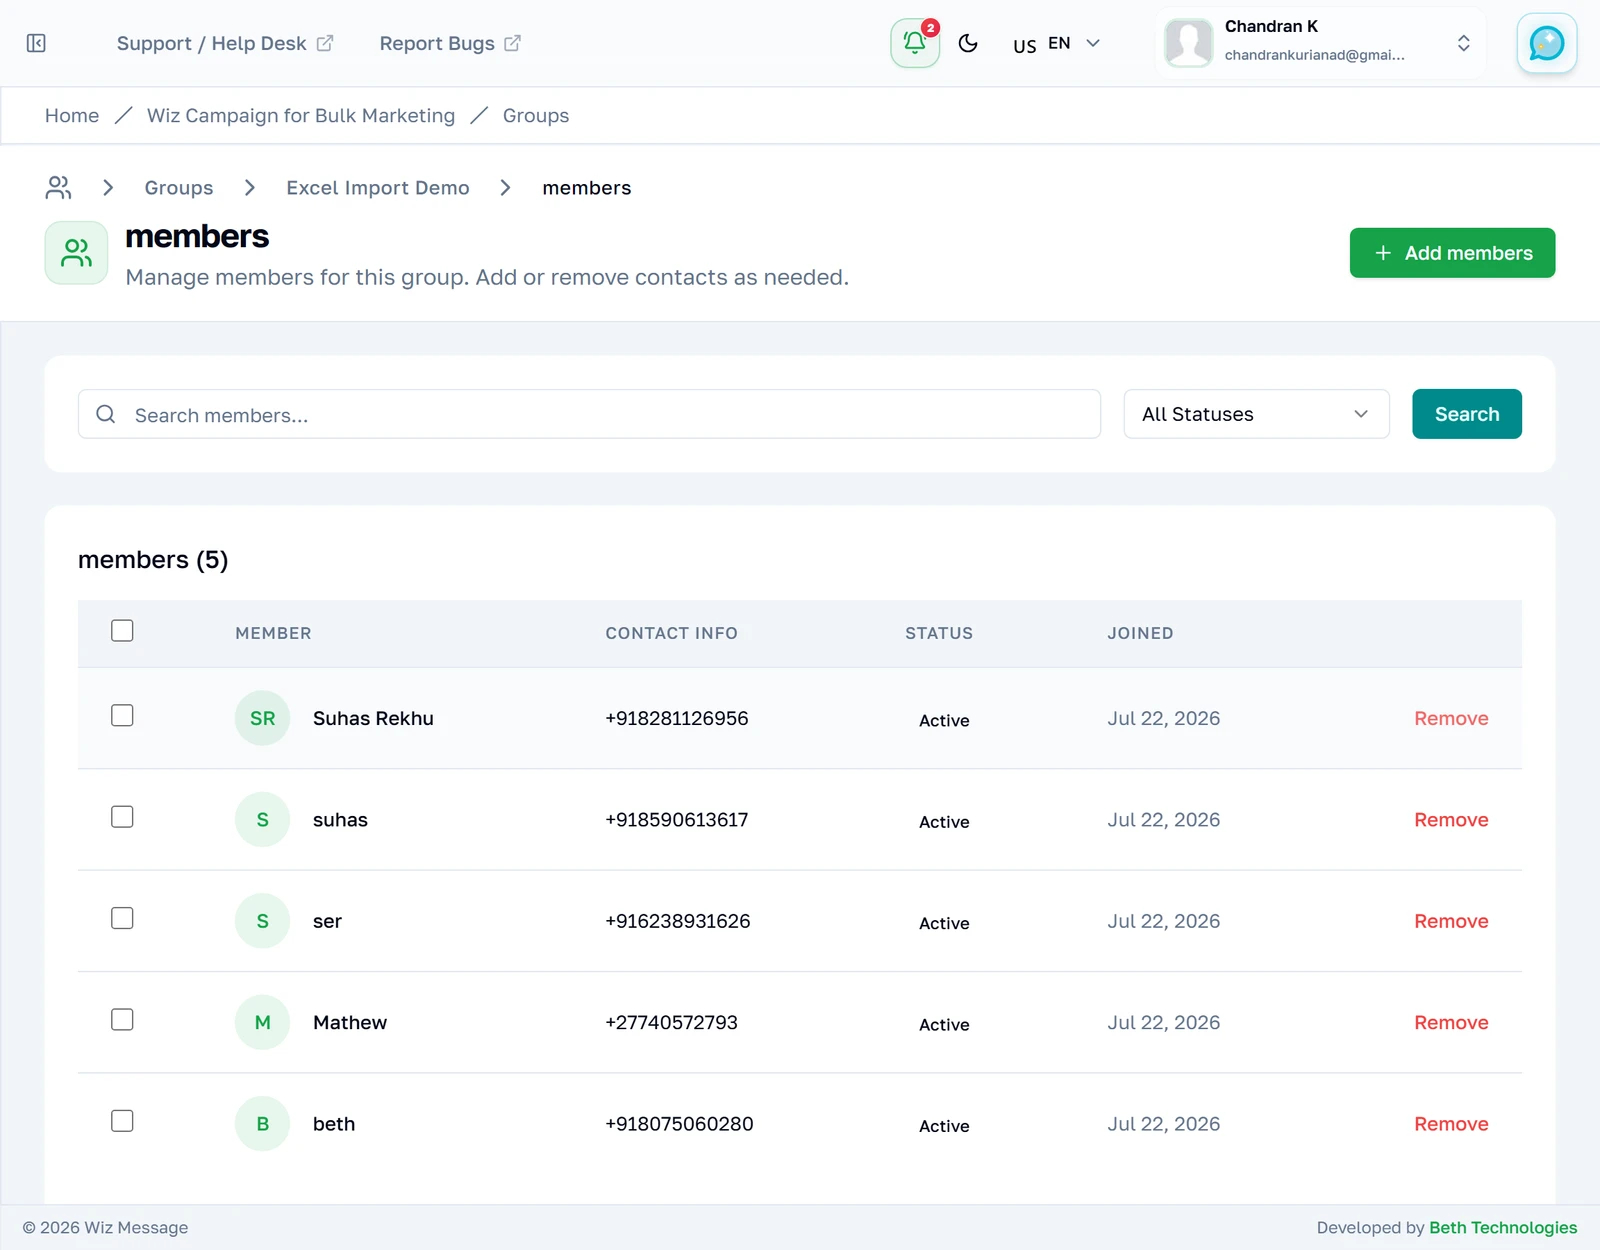
Pressing Remove asks you to confirm in a plain browser box — not the dialog the product draws itself, and always in English whatever language your dashboard is set to. Confirm and the row disappears, the count drops, and the contact remains in your contact book and in every other group it belongs to.
Reference
What each screen does underneath, for anyone who needs to know exactly what a button touches. A group is also the answer to the question a campaign asks first — bulk campaigns pick a group and send to everyone in it, so the list you build here is the list that receives.
What the export actually contains
Selecting groups on the list and pressing Export Members downloads a single workbook with one worksheet per group, named after the group. Each sheet has exactly three columns — Name, Phone, Email — sorted by name. Groups you do not own are dropped silently rather than refused, so an export of five groups can legitimately come back with four sheets.
Note: There is a safety limit of 10,000 members per group, and the worksheet name is truncated to 31 characters because that is the limit Excel itself imposes. A group named longer than that exports under a shortened tab name.
What importing does to a contact you already have
The importer matches on phone number. A row whose number is already in your contact book does not create a second contact — it updates the name and email of the existing one from the spreadsheet, then adds it to the group. That is worth saying twice: a spreadsheet with a typo in the name will rename the contact you already had.
The result counts that case under Already Existed. Those contacts were added to the group; the counter is about the contact record, not about the membership. A file of ten rows where all ten numbers are known reports 0 added and 10 already existed — and the group still gains ten members.
Note: A number repeated twice inside one file is imported once. The first row wins and the duplicate is skipped, because a repeated number is the same person and the contacts table refuses two rows with the same number for one account.